
Hardware Specifications
Available Models
k470 - no HSM, 4x1Gbit ports
k470 - no HSM, 2x1Gbit ports and 2x10Gbit ports
k570 - HSM, 4x1Gbit ports
k570 - HSM, 2x1Gbit ports and 2x10Gbit ports
k160 - HSM
Specifications for k470 and k570
The base chassis for k470 and k570 are the same, and so the specifications are presented together. However, the k570 includes a PCIe HSM and the k470 does not.
The CipherTrust Manager k470 and k570 Appliances are 1U high and fit into standard 19-inch equipment racks.
Hardware Specifications for k470 and k570
| Hardware Specification | Value |
|---|---|
| Dimensions | 19.0"(W) x 21"(D) x 1.75"(H) |
| Weight | 12.7 kg(28lbs) |
| Memory | 16 GB |
| Hard Disk and Protections | 1 X 2TB SATA SE (Spinning Disk) |
| Serial Port | 1 |
| CPU | 1 CPU with 4 cores |
| Ethernet / NICs | 4 X 1 GB 2 X 10 GB 2 X 1 GB |
| IMPI | Not Available |
| Power Supplies | 2 Power Supplies; Average Power (Watts) 0.7A @120V 84W Maximum Power (Watts) 100-240V 50-60Hz Voltage: 100W Power Cord PSE Certified Available for multiple country profiles for power consumption |
| Chassis Intrusion Detection | k470 and k570: Tamper seals |
| Operating Temperature | 0 to 35°C (32 to 95°F) |
| Non-Operating Temperature | -20 to 60°C (-4 to 140°F) |
| Safety Agency Approvals | CB Scheme, CSA-UL, FCC Part 15, Subpart B, Class B, EN55032:2010, EN55024:2010, EN61000-3-2:2006 +A1:2009 +A2:2009, EN61000-3-3:2008 ICES-003 Issue 4 February 2004, C-Tick, AS/NZS CISPR 22:2009, VCCI V-3/2009.04, KN22, KN24, BIS (in progress) |
| FIPS 140-2 Certifications | Level 3 with HSM as root of trust |
| Embedded HSM Administration | K570 (Built in HSM) , Management Console and REST API allow configuration to HSM |
Firmware Specifications for k470 and k570
| Firmware Specification | Value |
|---|---|
| Administrative Interfaces | Management Console |
| Max Keys | k470, k570, k470v: 1,000,000 k170v: 25,000 |
| Max Domains | 1000 |
| API Support | REST, NAE-XML, KMIP, PKCS#11, JCE, .NET, MCCAPI, MS CNG |
| Security Authentication | Username/Password (Local User), AD/LDAP , Certificate based authentication |
| Cluster Support | Clustering is supported between physical and /or virtual appliances for High Availability |
| Backup | Manual and Scheduled; Option for HSM key to encrypt CM backup |
| Network Management | SNMP v1, v2c, v3 , NTP, Syslog-TCP |
| Syslog Formats | RFC-5424, CEF, LEEF |
| Software Certifications and Validations | FIPS 140-2 L3 with k570; K470 and Virtual CipherTrust Manager can use an External HSM as Root of Trust for Master Key protection |
Front Panel for k470 and k570
The front panel is illustrated below, with the secure locking bezel removed:

| Item | Name | Description |
|---|---|---|
| A | Front ear brackets | Connect to the front of the appliance chassis with the provided screws, allowing it to be mounted in a standard 19-inch equipment rack. The extending tabs act as posts for the locking bezel. |
| B | Mounts for locking bezel | The secure locking bezel connects to the appliance faceplate here. |
| C | Front-panel display | Displays basic configuration and status information for the appliance. |
| D | USB 3.0 ports | These USB ports are not used and are disabled. |
| E | Stop/start switch | Powers the appliance on or off. |
| F | Fan status LEDs | The appliance has three (3) cooling fans. If these lights are illuminated, the fans are working correctly. |
| G | Ventilation fan filter cover | Removable cover allows cleaning of air filter. |
| H | Fan bay securing screws | Torx screw secures the fan bay. Opening to swap fan modules triggers a tamper event on the appliance. |
Rear Panel for k470 and k570
The rear panel is illustrated below:

| Item | Name | Description |
|---|---|---|
| A | Sliding rail brackets | Connect to the sliding rails mounted on the sides of the appliance chassis, allowing it to be mounted in a standard 19-inch appliance rack. |
| B | Kensington lock connector | Allows the appliance to be secured to a desk or equipment rack using Kensington lock. |
| C | Models with HSM: HSM card with USB port | When authenticating with a PED, the PED must be connected directly to the USB port of the HSM card. The other USB ports on the appliance will not work for PED connection. |
| C | Models without HSM: No HSM card | No HSM card installed - a blank plate is installed. |
| D | USB 3.0 ports | These USB ports are not used and are disabled. |
| E | RJ45 serial port | Connect a terminal to this port using the included RJ45 to USB cable. |
| F | Fan status LEDs | The appliance has three (3) cooling fans. If these lights are illuminated, the fans are working correctly. |
| G | Decommission button | This button should only be pressed as part of decommissioning and zeroizing the appliance. |
| H | Power supplies | 2 Power Supplies connect the appliance to power. For proper redundancy and best reliability, the power cables should connect to two completely independent power sources. |
Network Interface for 1Gbps k470 and k570 Models
1Gbps models come with four 1 Gbit RJ45 Ethernet network ports (labeled 0, 1, 2, and 3). The network interfaces are mapped to Ethn, as detailed in the following illustration.

All ports are identical and equally usable and can be bonded in any combination. By default port Eth0 is configured for DHCP but this can be configured.
Refer to Network Configuration Tutorial for more information.
Network Interface Mapping for 1Gbps/10Gbps k470 and k570 Models
10 Gbps models provide two 10Gbps SFP optical Ethernet network ports (labeled 0 and 1) and two 1Gbps copper RJ45 network ports (labeled 2 and 3). The network interfaces are mapped to Ethn, as detailed in the following illustration.

You can optionally bond the network interfaces Eth0 with Eth1 or Eth2 with Eth3 to form a logical interface, providing a redundant active/standby virtual interface. By default port Eth0 is configured for DHCP but this can be configured.
Refer to Network Configuration Tutorial for more information.
Front Panel LCD for k470 and k570 Models
The Front Panel displays the product name (CipherTrust), the firmware version, and the IP address of any configured network interface.

HSM Emergency Decommission Button for k570 models
The CipherTrust Manager k570 Appliance includes a way to decommission the HSM, or permanently deny access to all objects on it, without need for either a serial console or a remote (SSH) connection.
To directly decommission the HSM inside the appliance, press and release the small red button on the rear panel.
The appliance does not need to be powered on.
The appliance does not need to have power cables connected.

You will need a small screw-driver or other tool to reach the Emergency Decommission button. This is intentional, to prevent accidental pressing of that button.
What the Emergency Decommission Button Does
When you press the Decommission button, all partitions and their contents are deleted, as well as the audit role, and the audit configuration. The HSM policy settings are retained.
For k570 models, pressing the Decommission button makes all data and keys created on the CipherTrust Manager become permanently unusable, including keys in backups associated to the HSM.
To bring the HSM back into service, you need to:
Reinitialize the HSM.
Reinitialize the audit role and reconfigure auditing.
Recreate the partitions.
Reinitialize the partition roles.
Reset the system
kscfg system reset.Setup the HSM as described in Hardware Security Module.
At this point, you can recreate encryption keys on CipherTrust Manager.
Power Consumption for k470 and k570 Models
When installed and connected to appropriate electrical power sources, CipherTrust Manager k470 or k570 Appliance draws power as follows:
| Activity | Draw |
|---|---|
| Standby (connected to AC electrical mains but not powered on) | 26W (typical) |
| Power-on Input Surge | 15A (typical) 40A at 90-132VAC (max) 60A at 180-265VAC (max) |
| Active (under load from clients) | 84W to 90W (typical) 100W to 105W (max) |
The appliance has two power supplies, each rated at 350W, either of which is capable of running the system alone.
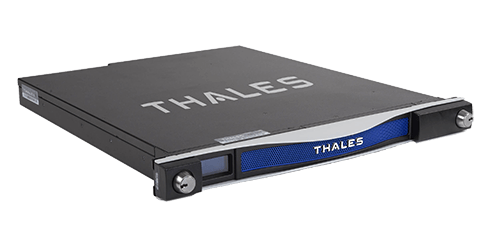
Hardware Specifications for k160 Model
The TCT CipherTrust Manager k160 Appliance is a compact cryptographic key management platform that protects and manages cryptographic keys and associated policies used to encrypt the most sensitive data-at-rest. This cost-effective solution is ideal for small to medium sized deployments commonly found in small offices, remote sites, and tactical environments. The k160 includes a FIPS 140-2 Level 3 token or a high assurance cryptographic token as its hardware root of trust. The token hardware security module (HSM) operates as a secure root of trust by encrypting all sensitive objects (e.g. keys, certificates, etc.) in CipherTrust Manager, with keys that are generated by, and reside in, the token HSM. The removable token HSM provides and easy to use method to support common key management scenarios such as rapid key delivery disablement, key destruction, cryptographic erase, and time of use restrictions. Simply removing the token allows for keeping mission critical data safe.

k160 Technical Specifications
Physical Characteristics
CipherTrust k160 Dimensions: 6.5” x 4.0” x 1.5”
Weight: 1.2 lbs.
Direct mount or 1U 19in. rack mount (optional accessory)
Thermal Storage: -30°C ~ 80°C
Thermal Operation: -30 ~ 65°C
Storage Humidity: 5 ~ 95% @ 40C
Operating Humidity: 0% ~ 90% relative humidity
Vibration Testing: Random, 1Grm, 5~500Hz
Power: included external power supply; locking DC power connector
Power Range: input 120-240V AC, 1.5A, 50-60Hz; output 12V DC, 40W
Interfaces
Web UI Management
Serial and SSH command line
KMIP, NAE-XML, and REST API
1G Ethernet interface
Integrated Token HSM connection
k160 Front Panel
The front panel is illustrated below, showing the High Assurance token inserted:

| Item | Name | Description |
|---|---|---|
| A | Power On/Off | Powers the appliance on or off. |
| B | Round button 1 | Reserved for future use. |
| C | Round button 2 | Reserved for future use. |
| D | USB HSM token | High Assurance Token. |
k160 Rear Panel
The rear panel is illustrated below:
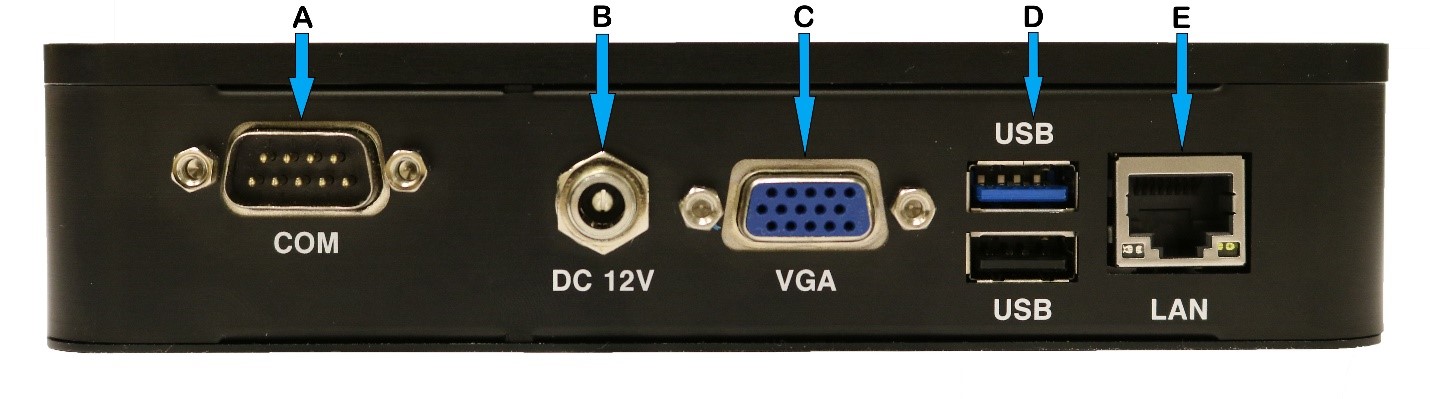
| Item | Name | Description |
|---|---|---|
| A | Console Port | Connect a terminal to this port using the included DB9 to USB cable. |
| B | DC 12V | Power Adapter connection. |
| C | VGA | Connect a standard VGA monitor. |
| D | USB ports | Disabled/Not used. |
| E | LAN | CAT5 Networking Port |