
Using Microsoft Azure Entra ID Multifactor Authentication for CTE GuardPoints
Create an OIDC Application in Entra ID
-
Select Microsoft Entra ID from your Azure Homepage.
-
Click App Registration.
-
Create a New Registration.
-
Record the client ID. You will need it when you create an OIDC connection on CipherTrust Manager.
-
Click Certificates and Secrets in the left Nav bar.
-
Create a new Client Secret. This is the Client Secret value that you will enter in CipherTrust Manager.
-
For the Redirect URI, select Web.
-
Enter redirect URL with your local host name:
http://<localhost>:5560/auth/callbackand save it. -
Click on the name of your registration and click Endpoints.
-
Copy the value for the Endpoint for OpenID Connect metadata document. This is the OIDC Provider value that you will enter in CipherTrust Manager.
Create an OIDC Connection in CipherTrust Manager
-
Log on to the CipherTrust Manager as an administrator.
-
In the left pane, click Access Management > Connections.
-
In the Connections, click Add Connection.
-
Click OIDC and then click Next.
-
Provide a name for the connection and click Next.
-
Enter values collected in the previous section for the configuration information.
-
OIDC Provider:
<value for the Endpoint for OpenID Connect metadata document> -
Client ID
-
Client Secret
-
-
Click Next and in the Add Products window, select CTE for product.
-
Click Add Connection.
Set Client Profile in CipherTrust Manager
-
In CipherTrust Manager, open the Transparent Encryption application.
-
In the left pane, click Settings > Profiles.
-
Select the desired client profile.
-
Expand MULTIFACTOR AUTHENTICATION.
-
Select the OIDC Connection that you created for Entra ID.
-
Select MFA Exempted User Set from the drop-down list. This user set will be exempted from MFA so MFA will not be enforced on the users of this set. See Exempting some users from authentication with a Whitelist for more information.
Domain Mapping
Domain mapping is required for Entra ID, unless you are using a custom claim, (see sections below). If you try to log in prior to mapping the domain, CTE generates an error. The command allows CTE to map an MFA domain to a CTE host domain. The mapping is global for the host which means that it is applied for all MFA logins. You can use the domain localhost.com to specify the default domain on the CTE host.
You must map the domain from the Entra ID domain to the domain of the existing CTE host. Ask your System Administrator for the domain information.
-
To set the domain, type:
voradmin mfa domains-map set <domainOnMfaProvider>:<domain2>Example
voradmin mfa domains-map set thalesgroup.com:qa.comResponse
Restart secfsd service to affect changes.Note
You can map multiple domains using a comma in between domain names. For example:
voradmin mfa domains-map set <domain-1-onMFA-provider>:<domain-1-onHost>,<domain-2-onMFA-provider>:<domain-2-onHost> -
To stop secfsd, type:
net stop secfsd -
To restart secfsd, type:
net start secfsd
User Principle Name Mapping
A User Principal Name (UPN) identifies a user in a domain or host, (ex: userName@domain). For many MFA providers, the UPN on the MFA provider and the CTE host are the same. In these cases, on successful MFA login, CTE can identify the user directly from the UPN provided during MFA login.
Use the domain mapping command described above, if only the domain is different.
On Azure EntraID, userName and domain may be different. This could happen as a result of Active Directory migration from the host to Azure through tools provided by Azure migration.
Configuring OIDC for User Name Extraction
If the userName and domain name are different, CTE can extract the UPN name from a specified "custom claim" in the OIDC ID token. An OIDC administrator must configure the OIDC app to provide on-premise userName and on-premise domain (<onPremiseSAMAccountName>@<onPremiseDomain>) in this claim. This information is available to Azure if AD migration was performed using Azure tools.
Note
-
For custom claims to be available, ensure that the authorization endpoint is configured to issue Access tokens and ID tokens. Refer to the Microsoft Entra ID documentation for configuring custom claims.
-
You only need to use the custom-claim if Azure AD migration changes `userName@host in Azure. If it does not, you do not need to use the custom-claim feature. Domain mapping is sufficient.
Configuring Custom Claims in Microsoft Azure EntraID
Note
Microsoft Azure EntraID documentation is maintained by Microsoft and subject to change at any time. This documentation was accurate at release. If you find that it is no longer accurate, refer to the Microsoft Entra ID documentation for configuring custom claims.
-
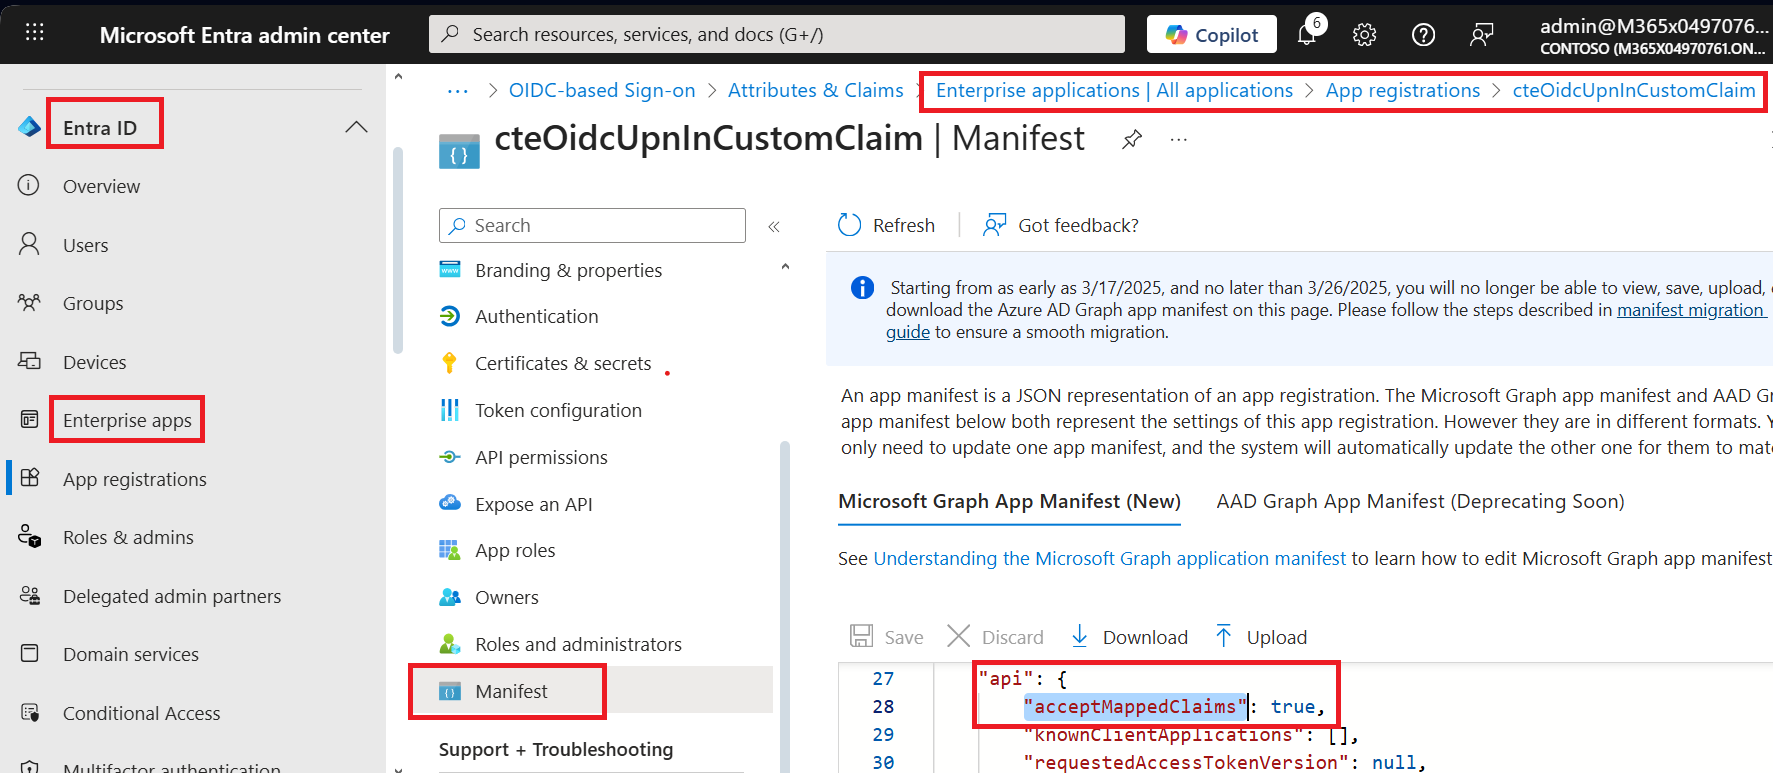
On the Azure EntraID portal, navigate to Enterprise Apps > Manifest.
-
Search for api > acceptMappedClaims and set to true.
-
To create a new claim, navigate to your OIDC app.
-
Navigate to Manage > Single Sign On > Attributes and Claims and click Edit.
-
Click Manage Claim and create a custom claim with the name custom-claim-upn to join
user.onpremisessamaccountname @ user.onpremisesdomainnameand click Save.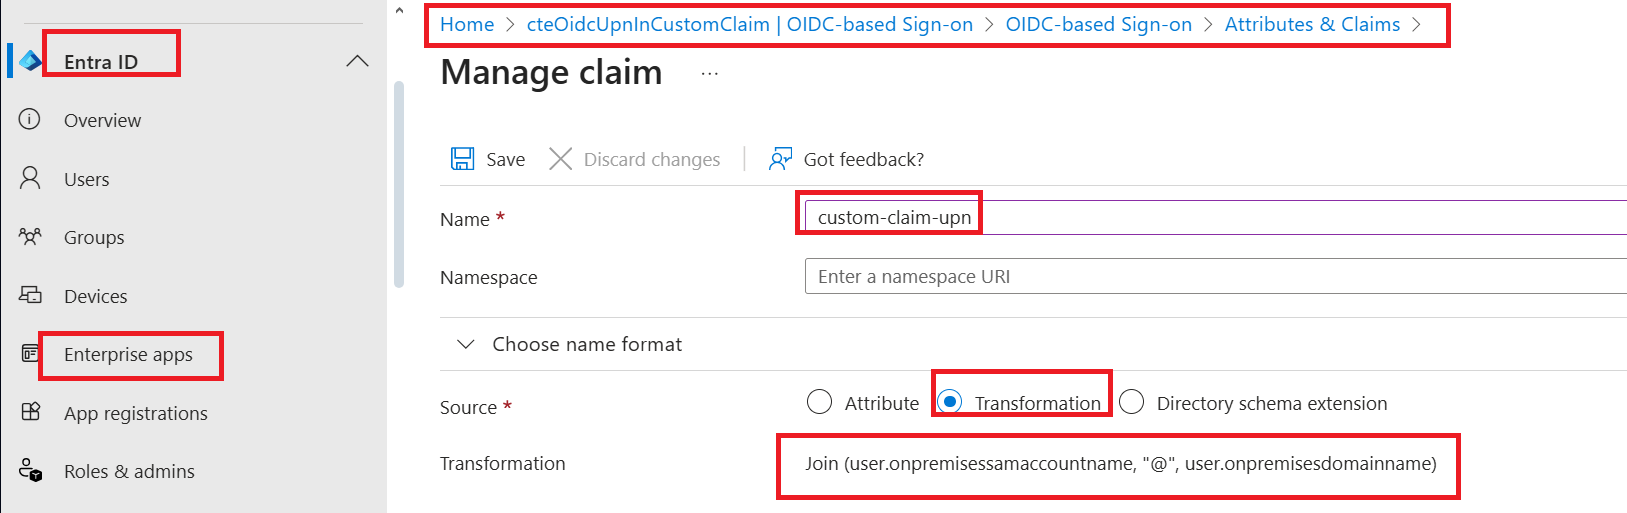
-
For custom claims to be available to CipherTrust Manager and CipherTrust Transparent Encryption, ensure that the authorization endpoint is configured to issue Access tokens and ID tokens. Navigate to Home > App registrations >
<Your OIDC app>> Manage > Authentication > Implicit grant and hybrid flows, and enable Access token and ID tokens.
Configuring Custom Claim field on CTE
-
Type the following to configure the custom claim field:
voradmin mfa upn-claim set <custom-claim-field-in-id-token>Example
voradmin mfa upn-claim set custom-claim-upnResponse
Restart secfsd service to affect changes. -
Stop secfsd, type:
net stop secfsd -
Start secfsd, type:
net start secfsd -
Verify that the claim was created, type:
voradmin mfa upn-claim getResponse
custom-claim-upn