


SafeNet Access Exchange Setup
This section describes the configuration required on SafeNet Access Exchange to enable it as the OpenID Connect identity provider for Stormshield SNS.
This section includes the following tasks:
- Create the Stormshield SNS client in SafeNet Access Exchange
- Generate the client secret
- Configure token claims
- Obtain the SafeNet Access Exchange configuration values for Stormshield SNS
Create the Stormshield SNS client in SafeNet Access Exchange
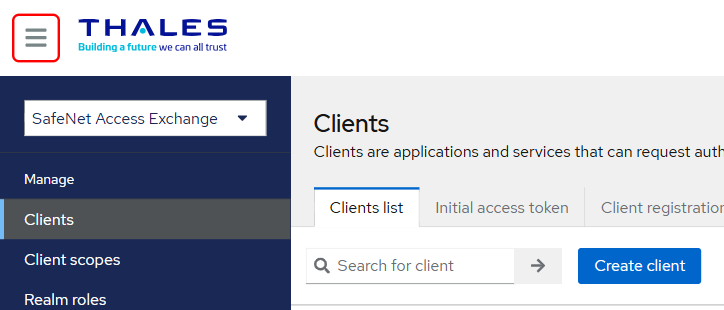
Open the Clients section
- Log in to the SafeNet Access Exchange admin console (
https://<safenet-host>/admin/master/console/). - In the left navigation menu, under the Manage section, click Clients.
-
On the Clients list tab, click Create client.
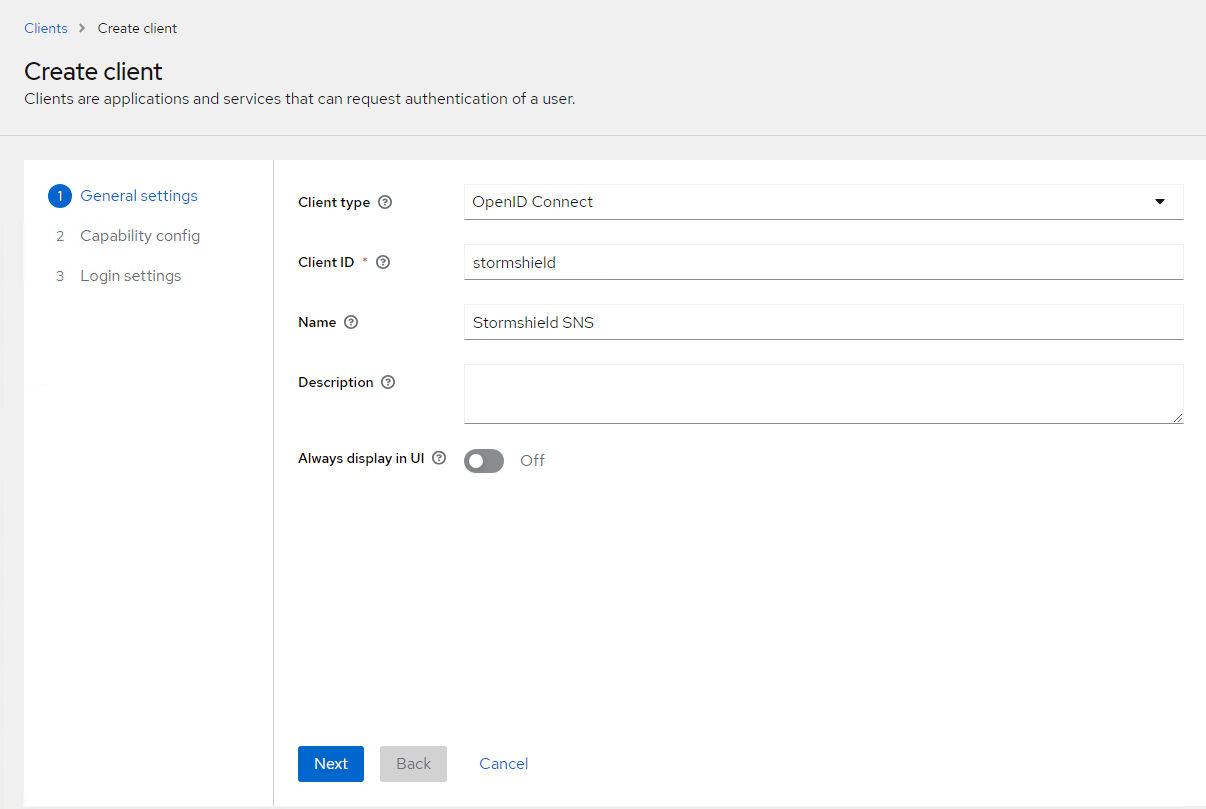
General settings
On the General settings page, configure the following settings and click Next:
- Client type: Select OpenID Connect.
- Client ID: Enter a unique client ID (for example,
stormshield). - Name: Enter a display name for the client (for example,
Stormshield SNS).
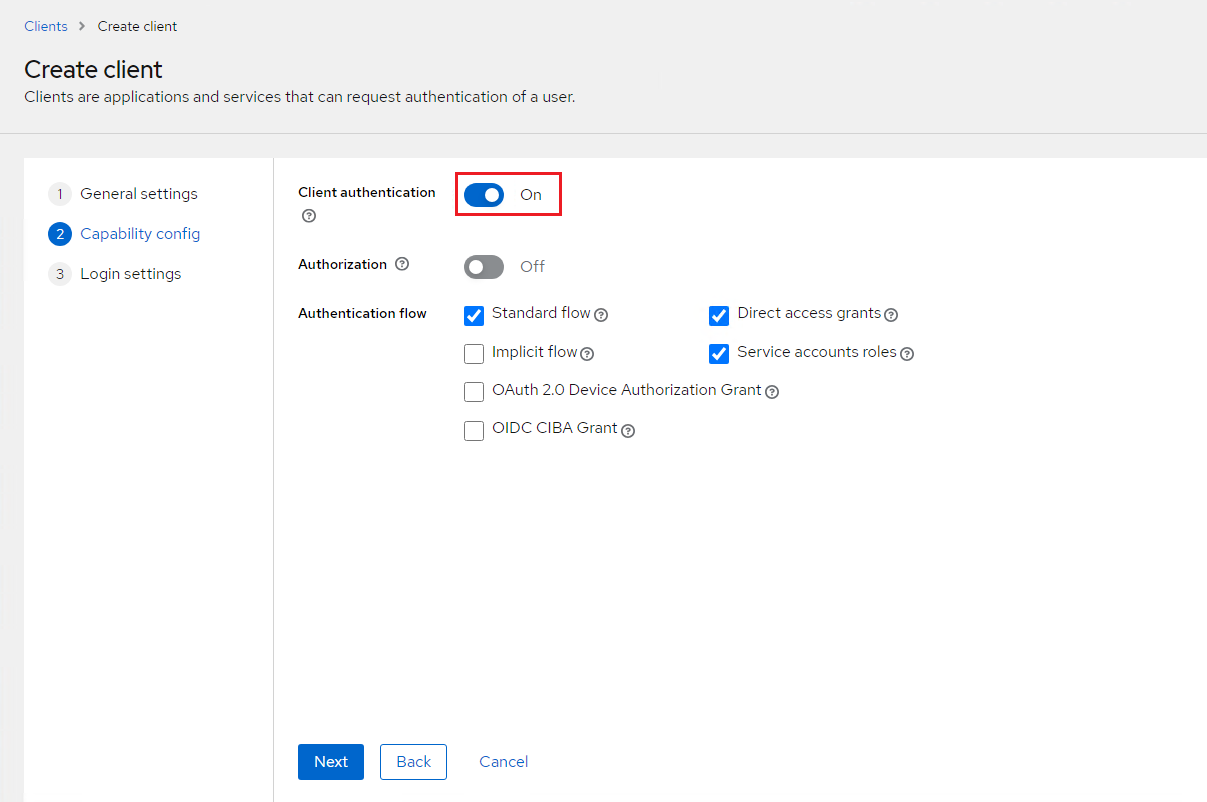
Capability config
On the Capability config page, configure the following settings and click Next:
- Client authentication: Turn on this option.
- Authentication flow: Ensure that Standard flow and Direct access grants are selected.
Note
In SafeNet Access Exchange, Client authentication ON is required to generate a client secret. Turning it on enables the Credentials tab after saving the client.
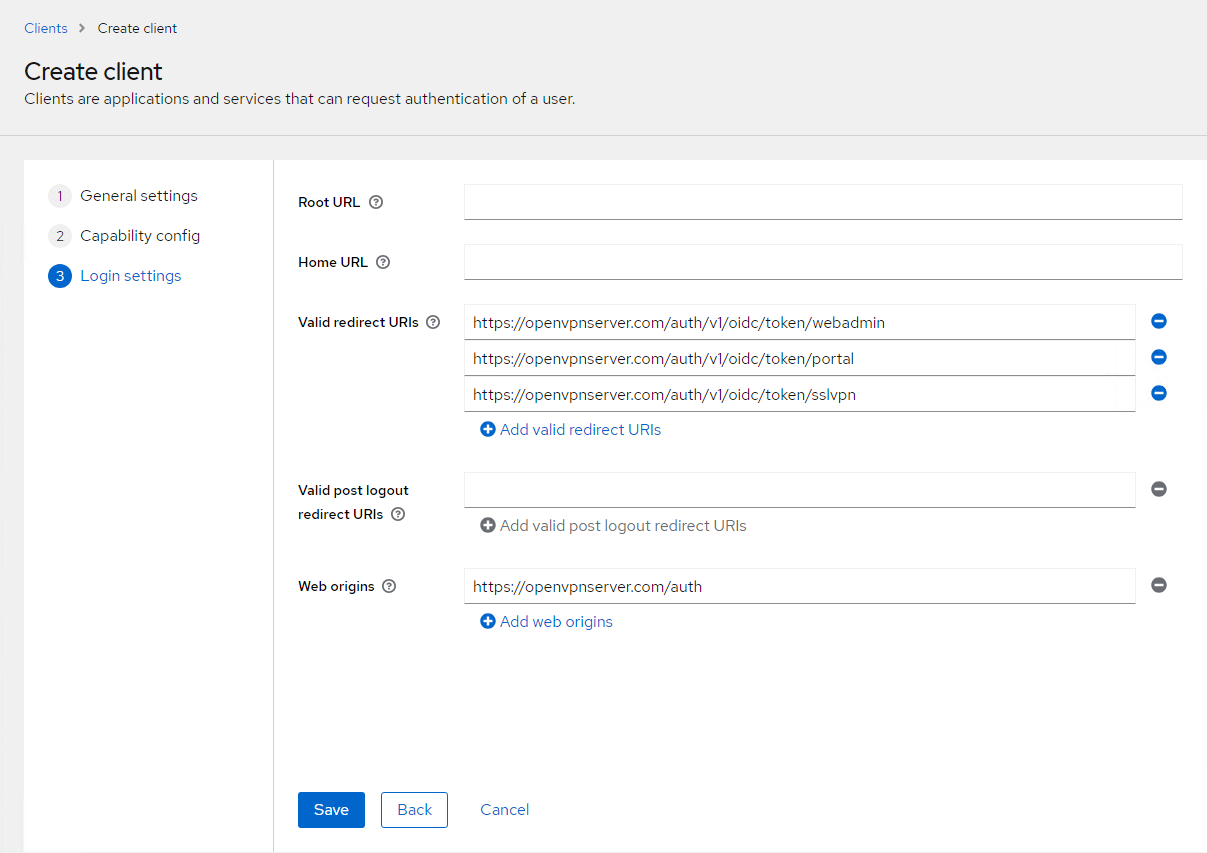
Login settings (Access settings)
On the Login settings page, configure the following settings and click Save:
- Valid redirect URIs: Enter the following Stormshield SNS redirect URIs:
https://<stormshield-sns-fqdn>/auth/v1/oidc/token/portalhttps://<stormshield-sns-fqdn>/auth/v1/oidc/token/sslvpnhttps://<stormshield-sns-fqdn>/auth/v1/oidc/token/webadmin
- Web origins: Enter
https://<stormshield-sns-fqdn>/auth.
Caution
Replace <stormshield-sns-fqdn> with the actual public FQDN of your Stormshield SNS appliance (for example, openvpnserver.com).
Generate the client secret
After you save the client, the client details page opens.
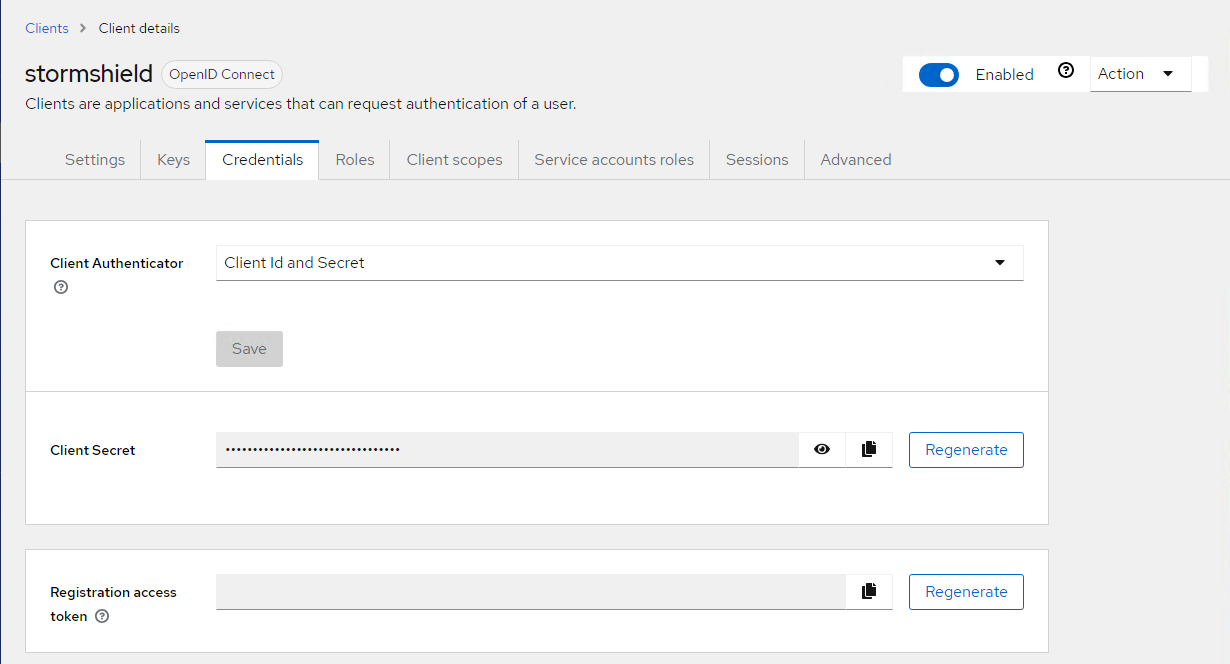
- Click the Credentials tab.
- In the Client Authenticator field, select Client Id and Secret.
- Next to Client Secret, select Regenerate.
-
Copy and securely store the generated client secret. You need this value when you configure the OIDC authentication method in Stormshield SNS.
Configure token claims
The Stormshield SNS OIDC connector requires the following claims in the token:
| Claim | Purpose |
|---|---|
preferred_username |
Identifies the user's login name. |
groups |
Provides security group membership identifiers. |
roles |
Provides application role identifiers. |
In SafeNet Access Exchange, configure token mappers for standard client scopes, such as profile, from Client scopes. You cannot configure these mappers in the client settings.
Open the profile scope
-
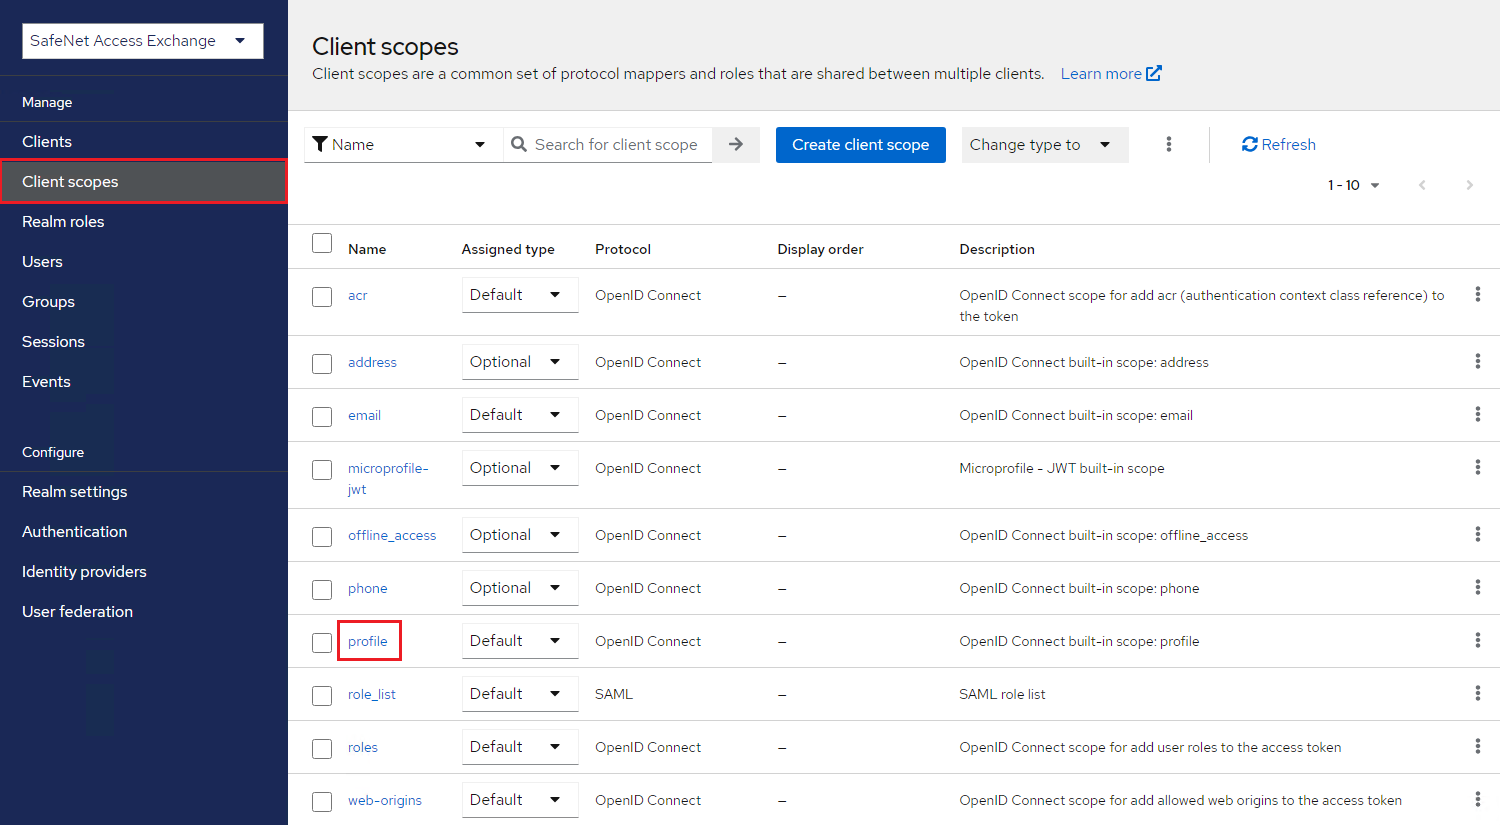
In the left navigation menu, under the Manage section, click Client scopes.
-
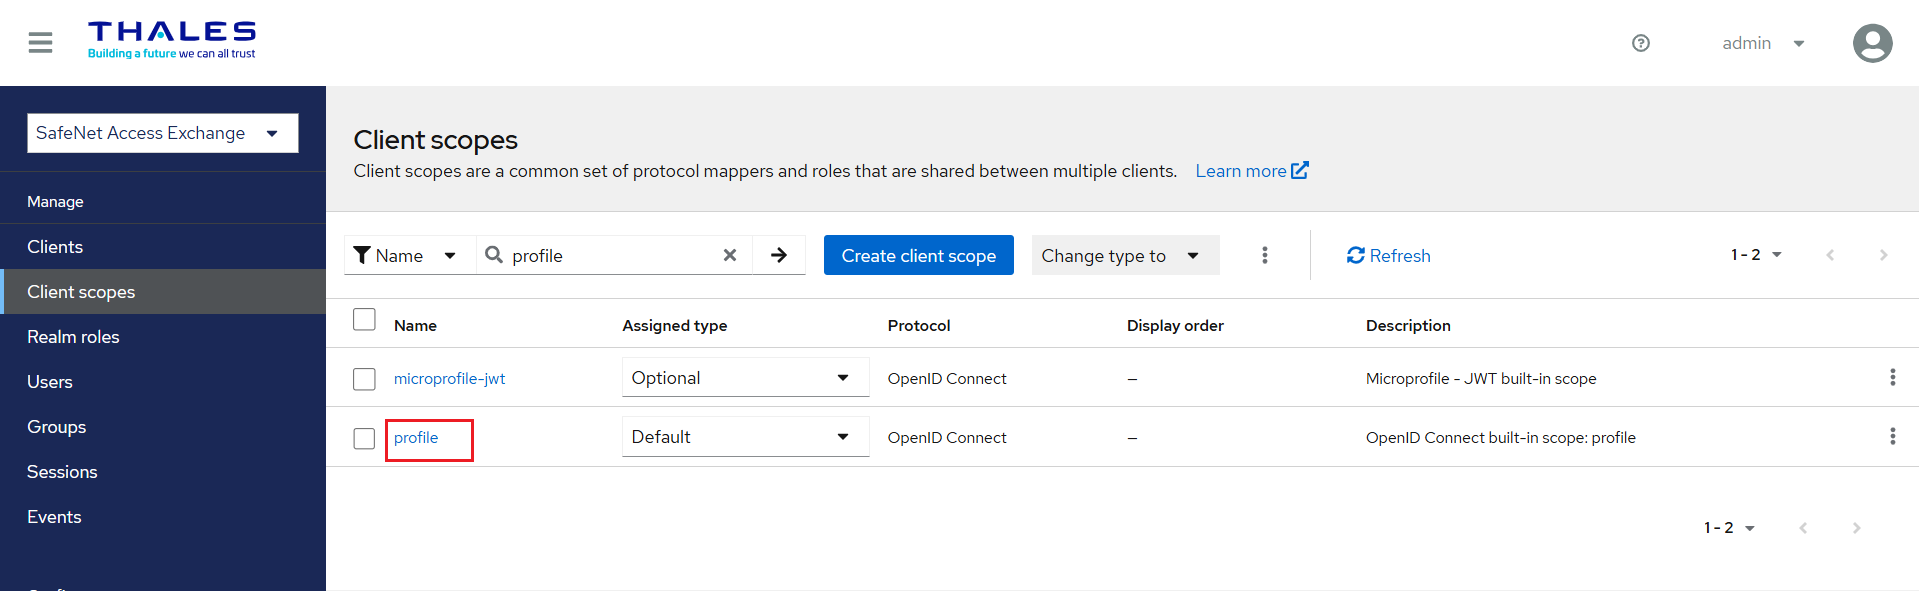
In the search box, enter
profile, and select → to filter the results. -
Select profile.
-
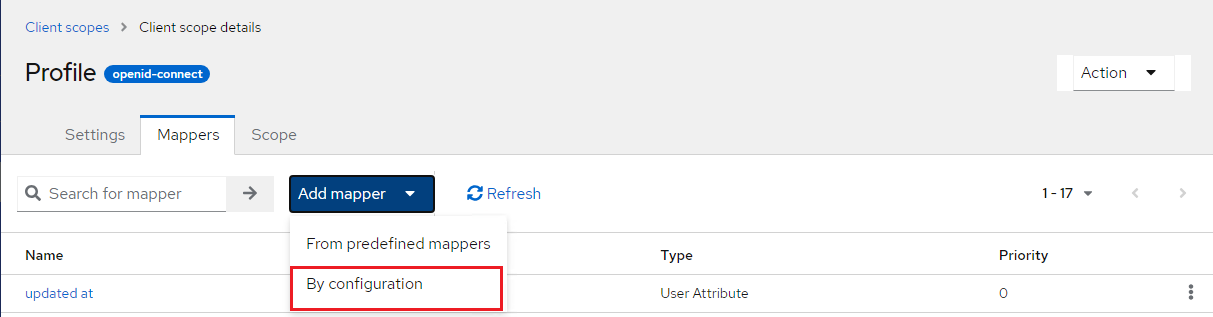
Go to the Mappers tab.
-
Click Add mapper > By configuration.
Note
The profile scope already includes built-in mappers (updated at, locale, nickname, zoneinfo, username, gender, website). The mappers you add here are additional mappers to expose the preferred_username, groups, and roles claims required by SNS.
Add the preferred_username mapper
-
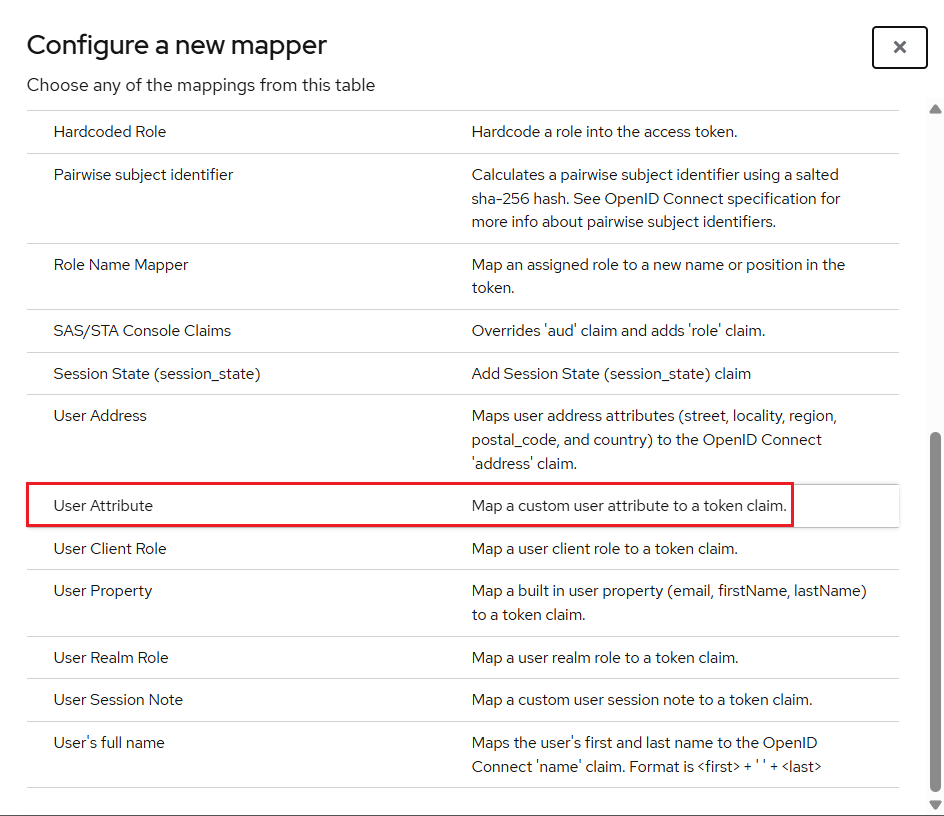
Select User Attribute as the mapper type.
-
Complete the following fields and click Save.
Field Description Name Enter preferred_username.User Attribute Enter username.Token Claim Name Enter preferred_username.Claim JSON Type Select String. Add to ID token Turn On. Add to userinfo Turn On. Add to token introspection Turn On. 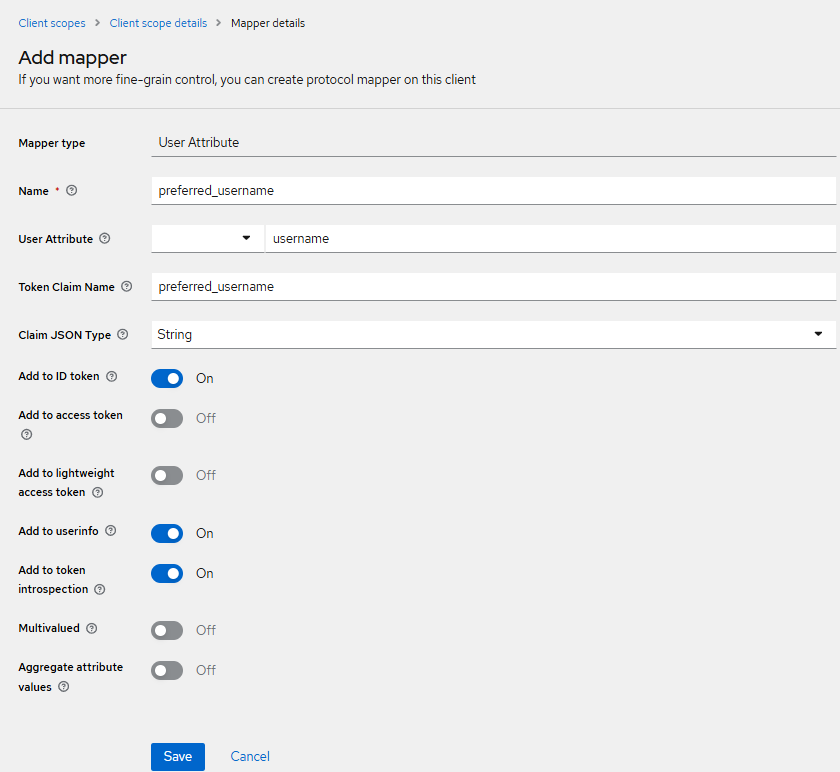
Add the groups mapper
- Click Add mapper > By configuration.
-
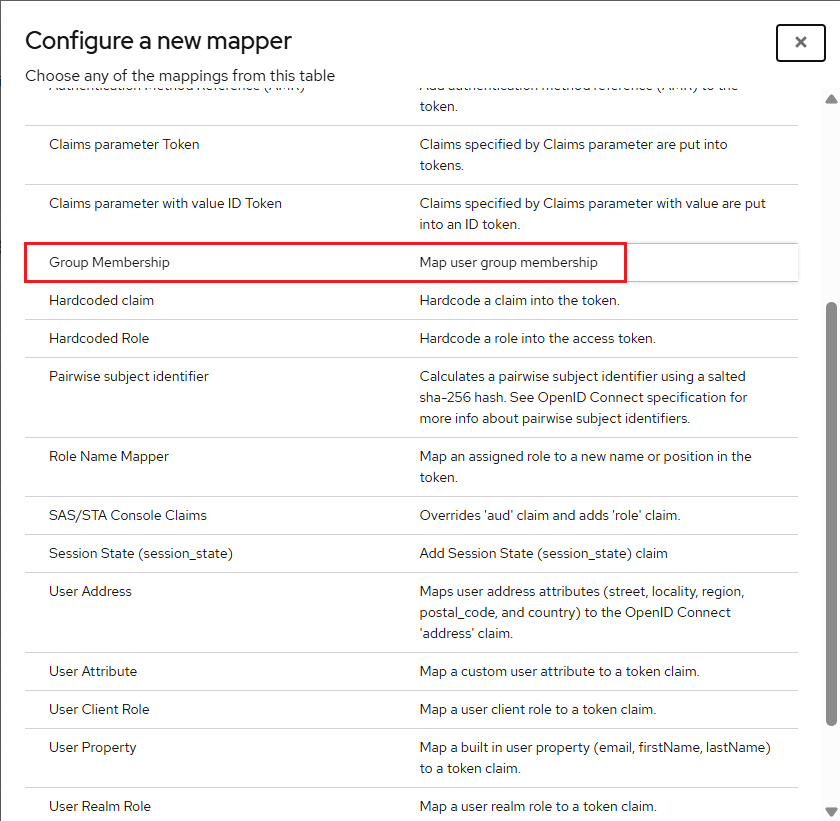
Select Group Membership as the mapper type.
-
Complete the following fields and click Save.
Field Description Name Enter groups.Token Claim Name Enter groups.Full group path Turn Off. Add to ID token Turn On. Add to userinfo Turn On. Add to token introspection Turn On. 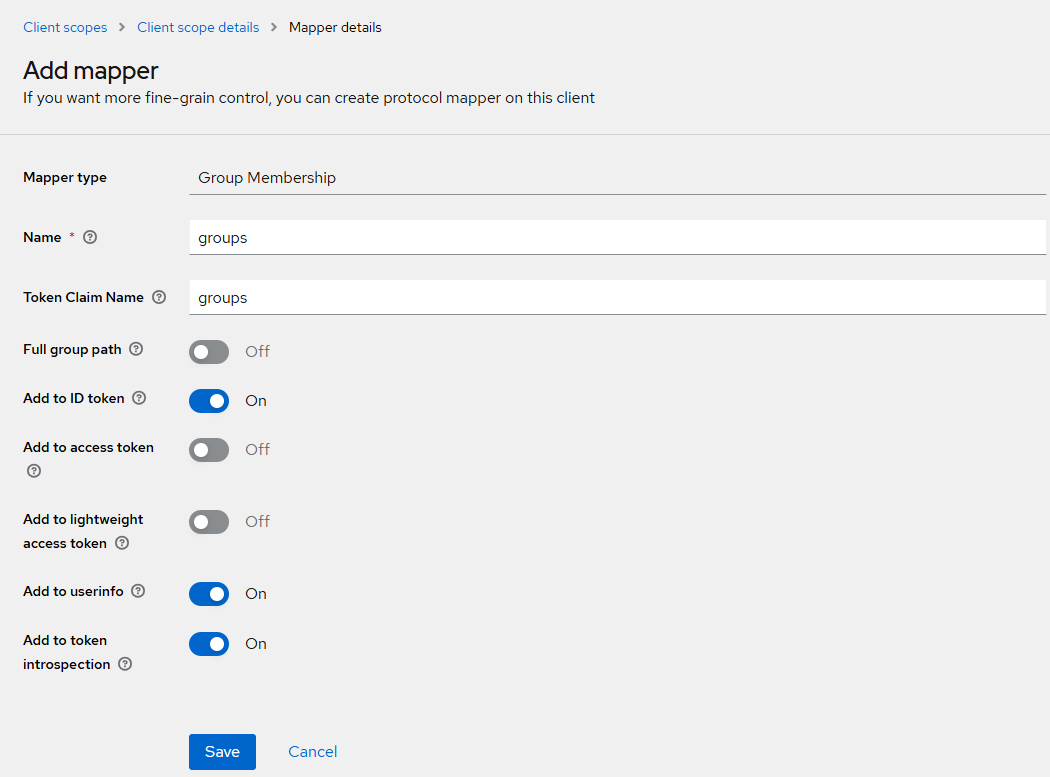
Add the roles mapper
- Click Add mapper > By configuration.
-
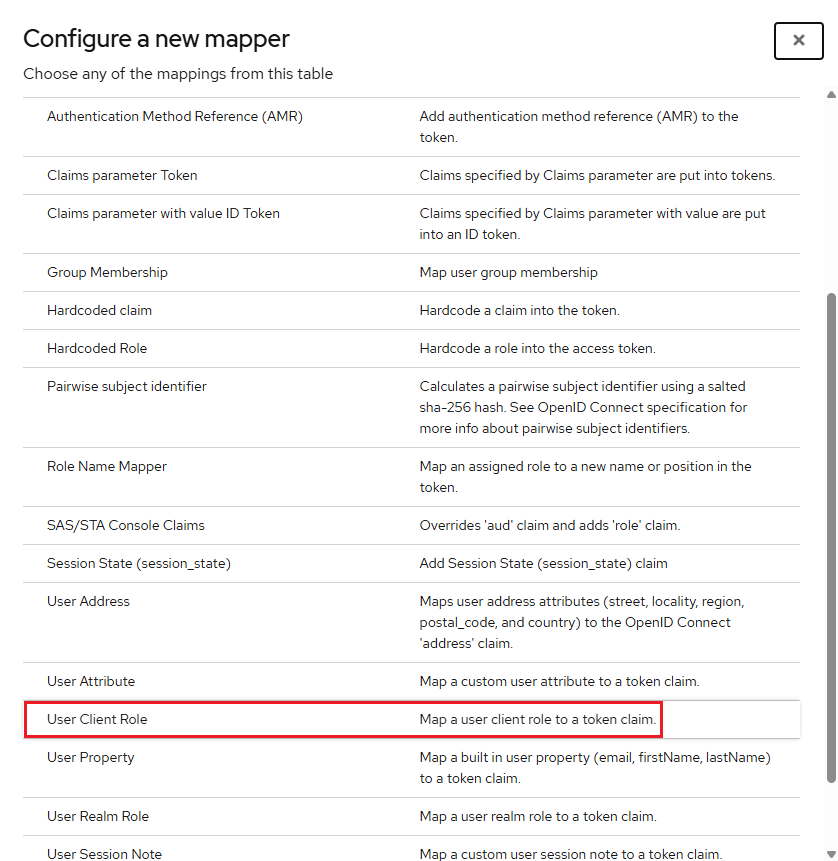
Select User Client Role as the mapper type.
-
Complete the following fields and click Save.
Field Description Name Enter roles.Token Claim Name Enter roles.Claim JSON Type Select String. Multivalued Turn On. Add to ID token Turn On. Add to userinfo Turn Off. Add to token introspection Turn Off. 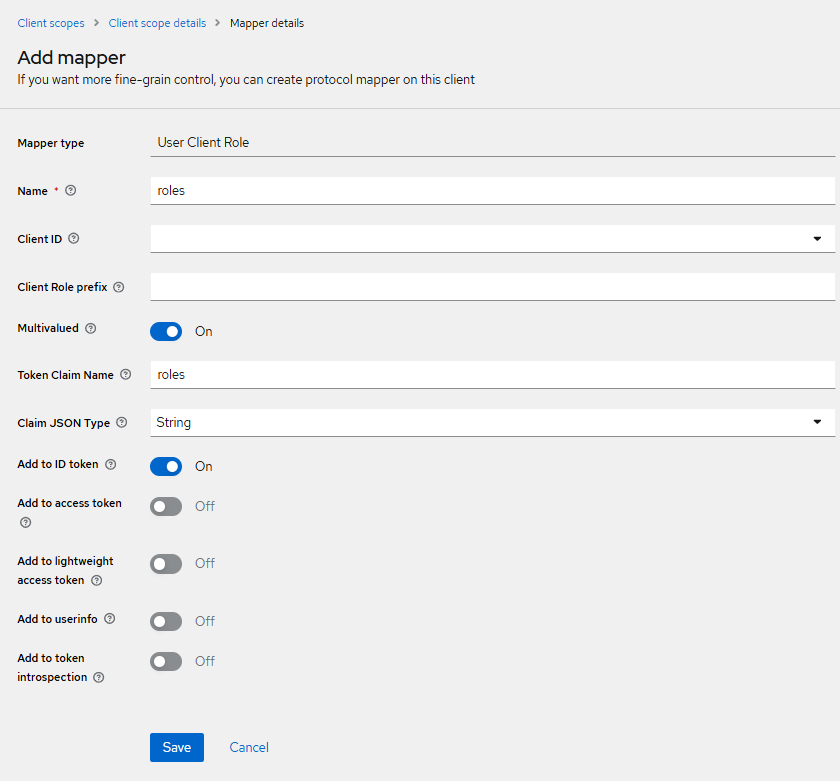
Obtain the SafeNet Access Exchange configuration values for Stormshield SNS
Before you configure OIDC authentication in Stormshield SNS, obtain the following values from SafeNet Access Exchange:
- Client ID: Go to Clients > Clients list and copy the Client ID for the Stormshield SNS client, for example,
stormshield. - Client secret: Go to Clients > Stormshield SNS client > Credentials, and copy the Client Secret.
- Issuer (Server URL): SafeNet Access Exchange FQDN, followed by
/realms/and the realm name. For example,https://sae.kaylabs.cyou/realms/SAE-HA.
You need these values when you configure the OpenID Connect method in Stormshield SNS Setup.

