



Authenticator Manager
The Authenticator Manager is a self-service portal that helps you manage your security keys (also known as FIDO devices) on your own. By using this portal, you can register new devices, reset them, change their PINs, and manage your settings without needing to contact your IT support or administrator.
In the Authenticator Manager portal, you can do the following tasks:
- FIDO device registration
- Resetting your FIDO device
- Changing your FIDO device PIN
- Unlocking your FIDO device
- Managing your fingerprints
Language support
The Authenticator Manager supports multiple languages to make it easy to use in your preferred language.
How the portal chooses your language
When you open the portal, it automatically decides which language to display. It checks the following settings in order:
- Your choice – If you manually change the language using the language drop-down menu, the portal remembers your choice. It keeps this language even when you log off and log on again.
- Your organization's default – If you have not chosen a language, the portal uses the default language set by your organization's IT department.
- Your browser language – If your organization has not set a default language, the portal uses the language set in your web browser.
- English – If the portal cannot detect your language, or if the language you select is not fully supported, the portal displays in English to ensure that everything continues to work correctly.
Changing the portal language
If you want to change the language manually, complete the following steps:
-
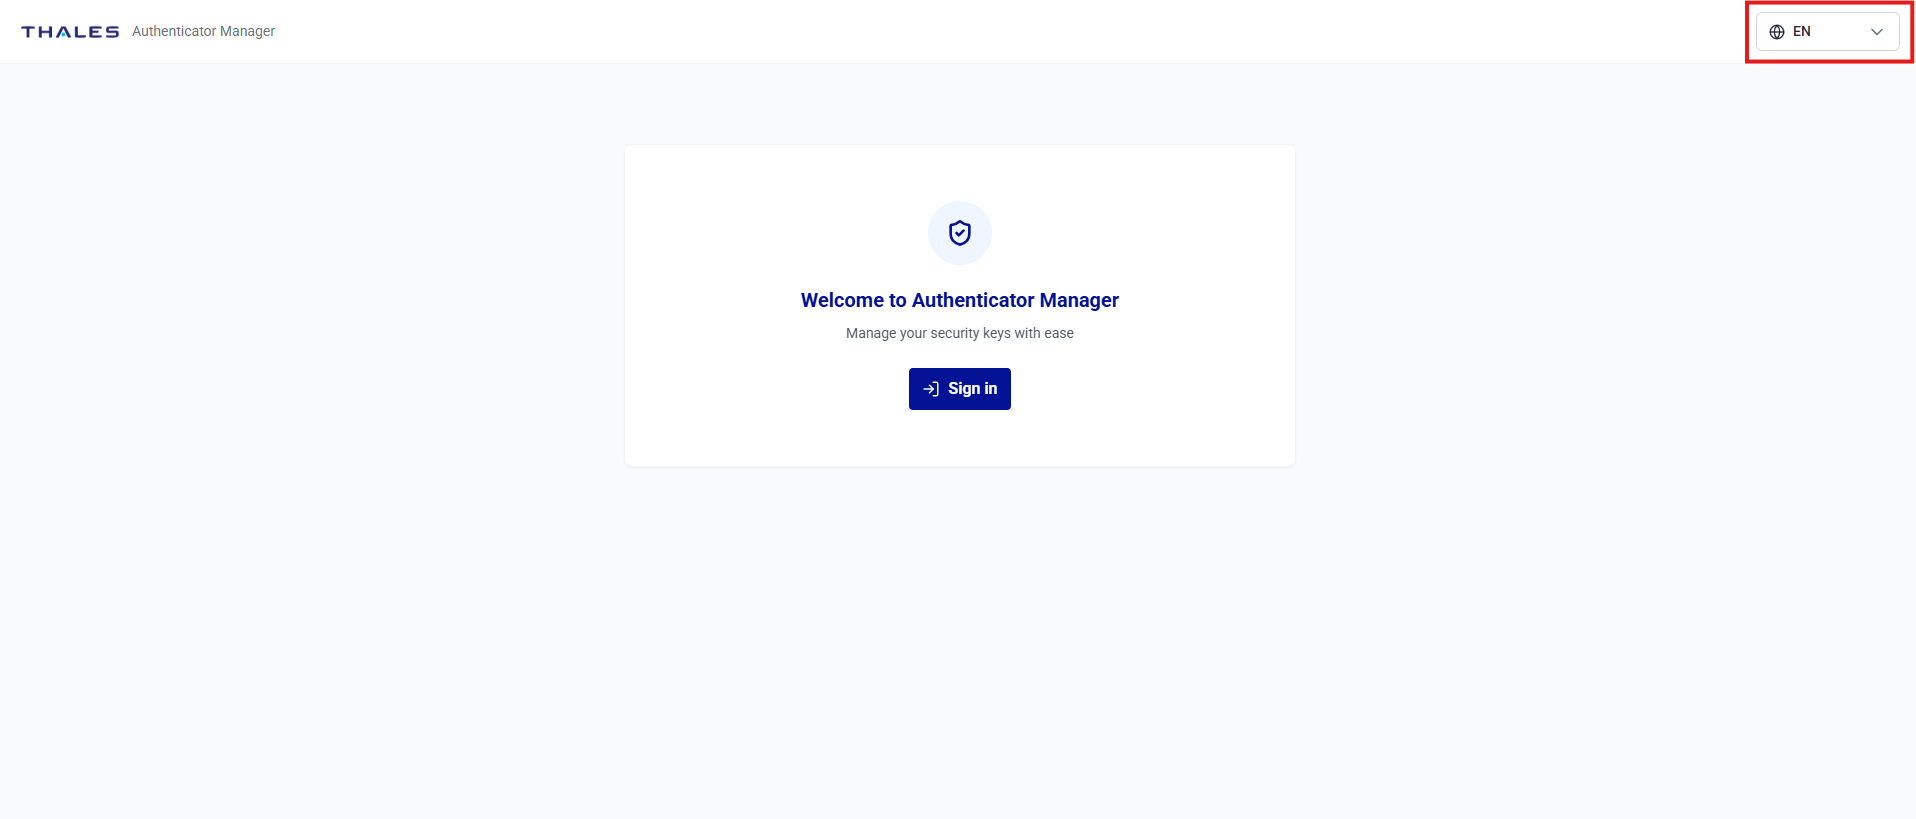
Locate the Language Switcher component on the screen.
-
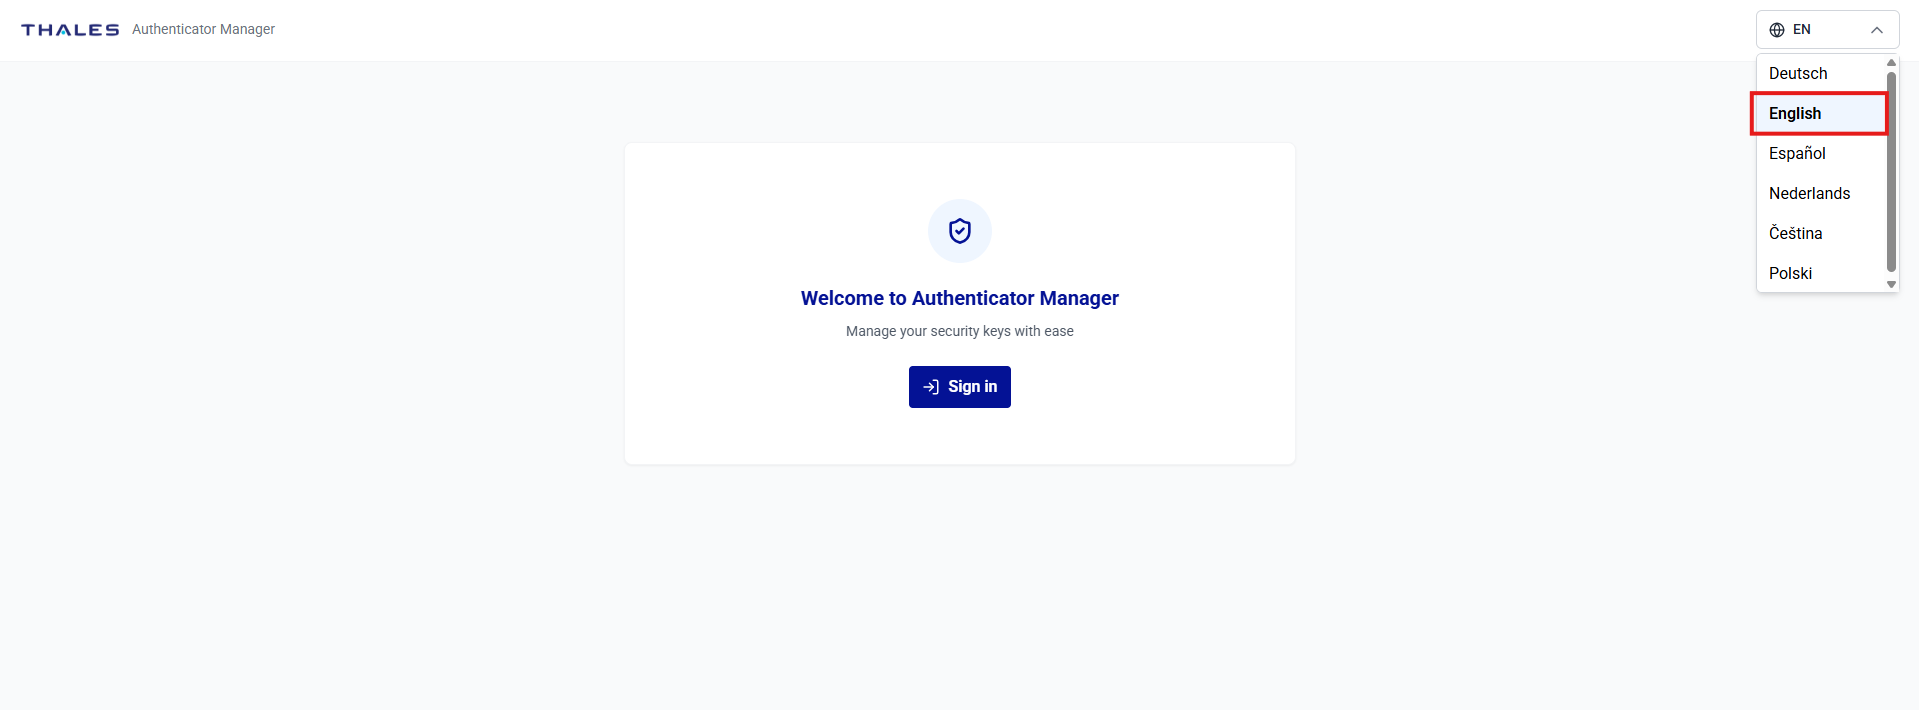
Select your preferred language from the list. The portal updates immediately to display your chosen language.
Note
If a language is only partially translated, some text may still display in English. This is normal and prevents errors on the page.
Customizing the portal appearance
As an administrator, you can customize the appearance (such as the logo and favicon) and translation settings of the Authenticator Manager portal to align with your organization's brand. This is managed through two main components in the console:
- Theme – Defines the visual and text assets for your portal, including the full logo, the browser icon (favicon), and custom translation files for each supported language.
- Brand – Applies a specific theme and defines which language options (locales) are available.
Note
For steps to create a theme and configure a brand, see Theme and Brand Customization.
Prerequisites
Administrator Prerequisites
Before end users can access the portal, a Thales Authenticator Lifecycle Manager administrator needs to complete the following prerequisites:
-
Register the external identity provider used to authenticate end users in the Authenticator Manager with the OneWelcome Identity Broker. For more information, see External IDP Configuration for Self Service.
-
Provide the Authenticator Manager URL to end users that is required to start self-service registration. The URL is generated automatically based on the selected identity provider and can be copied from the IDP's Self-service settings.
-
Configure the identity provider (for example, Microsoft Entra ID) in FIDO Provisioning that will be used to enroll end-user FIDO devices during self-service registration. For more information, see FIDO Provisioning.
-
Configure a policy with the Enable for self-service setting enabled to use it as the self-service enrollment policy. The policy is automatically applied during device configuration in the Authenticator Manager. For more information, see Policy Management.
Note
For more information about enabling and configuring self-service, see FIDO Provisioning, where self-service is configured as part of a Microsoft Entra ID identity provider.
User Prerequisites
Before you register a device, ensure that:
- You have a corporate account that is registered with the configured identity provider.
-
You have a supported FIDO device, such as a SafeNet eToken FIDO NFC Enterprise device.
Caution
The FIDO device must be new or reset before registration. If the device is already configured or already has a PIN set, contact your administrator.
-
The Thales Authenticator Lifecycle Service is installed and running on your computer. For more information, see Thales Authenticator Lifecycle Service.
Accessing the portal and listing your connected devices
-
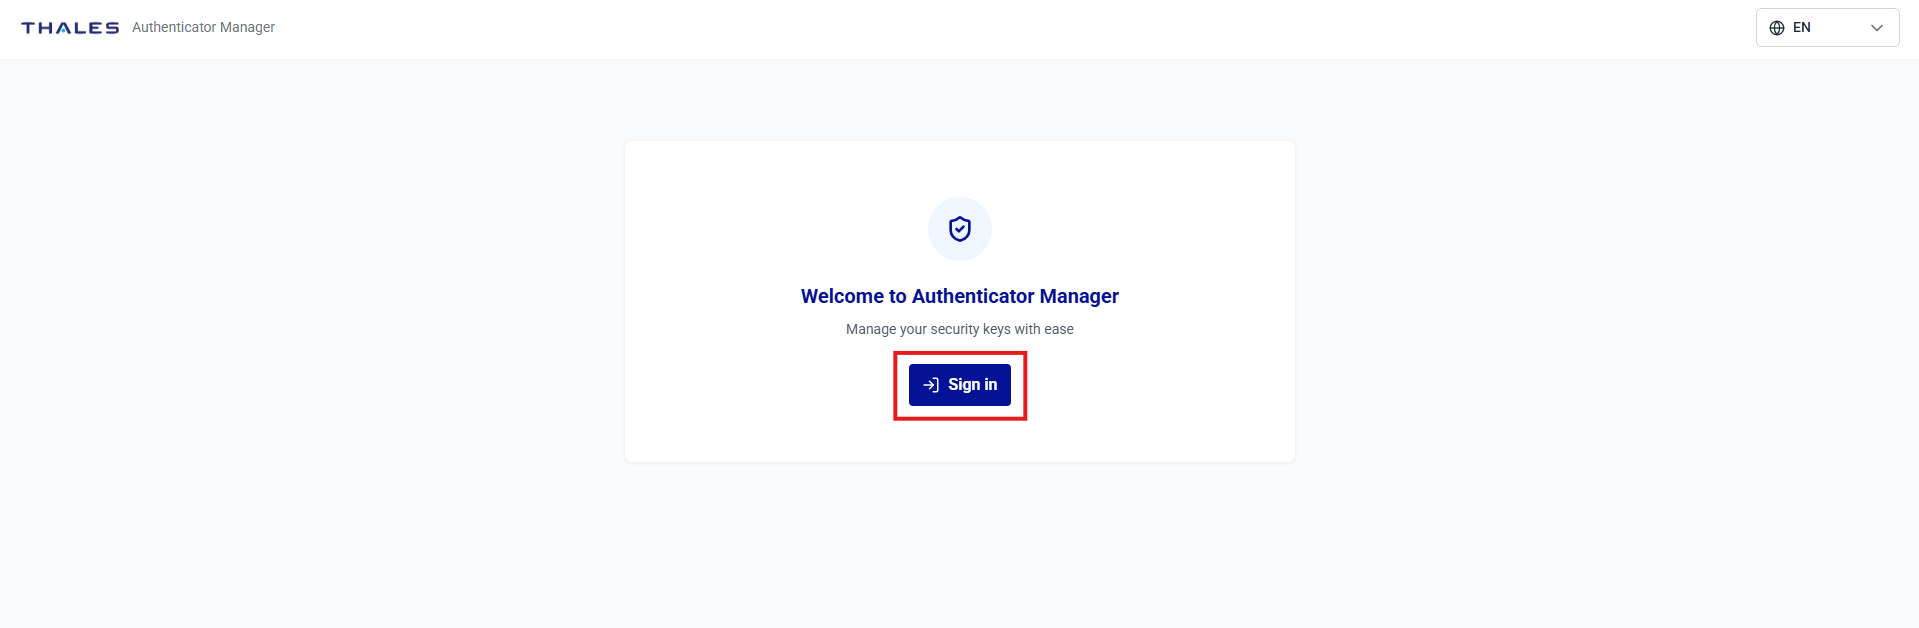
Open the unique Authenticator Manager URL in a web browser, and click Sign in. The portal redirects you to your company's logon page.
-
On the identity provider sign-in page, enter your corporate credentials and complete any multi-factor authentication if configured.
-
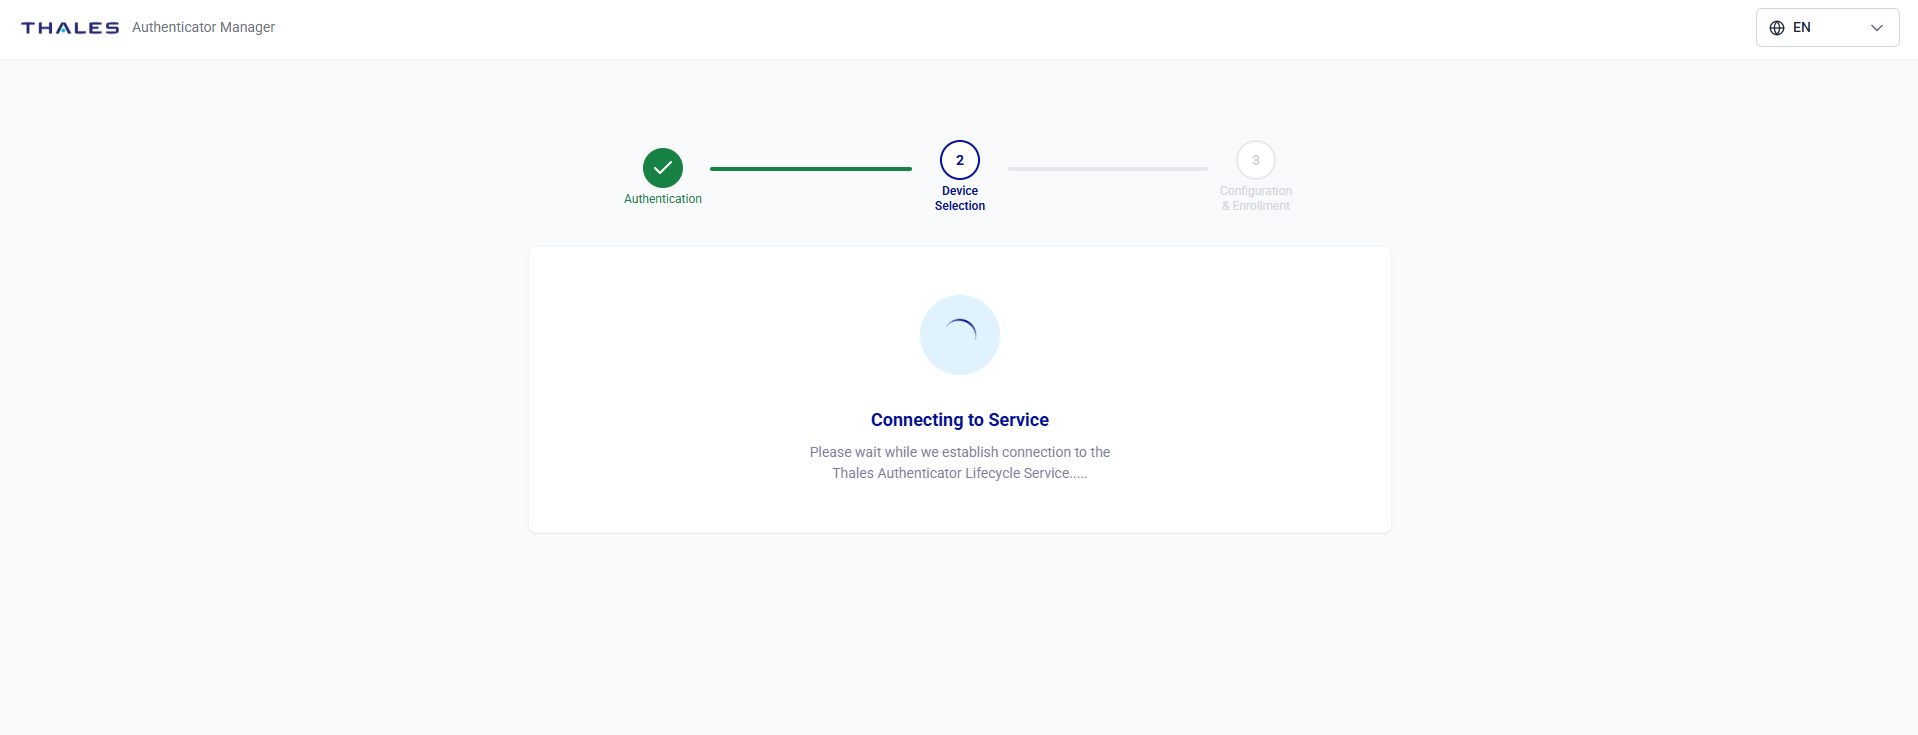
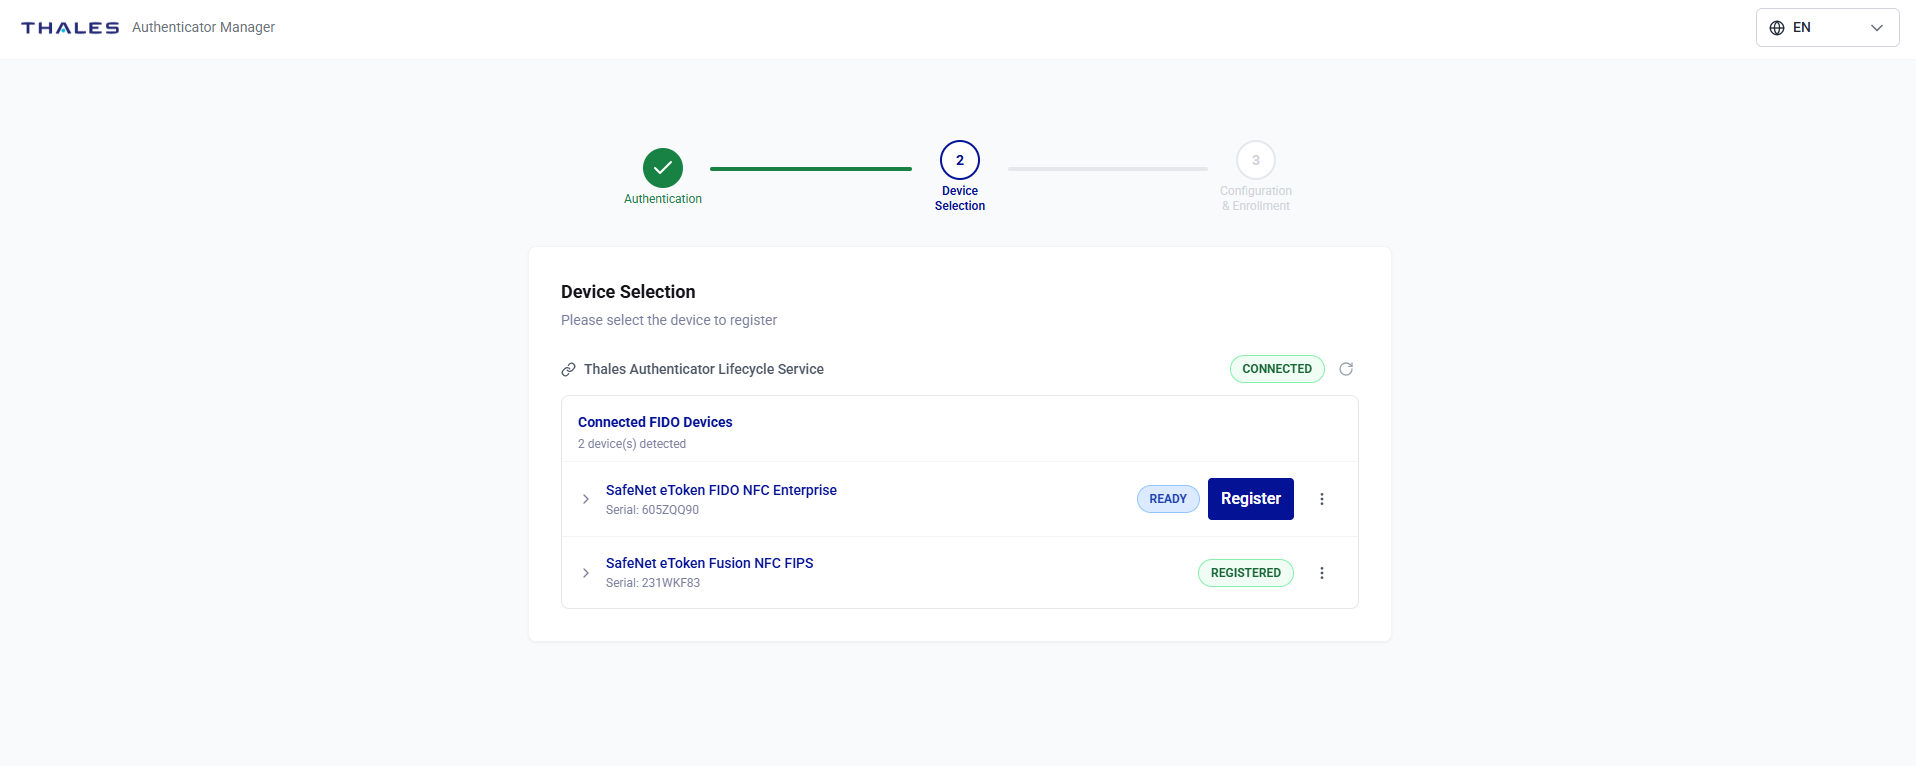
After successfull authentication, the portal connects to the Thales Authenticator Lifecycle Service to detect your device.
-
Wait for the Thales Authenticator Lifecycle Service status to show CONNECTED. After the connection is estabished, the portal lists all connected devices under Connected FIDO Devices.
-
To view details of a device, click the expand arrow
 icon.
icon.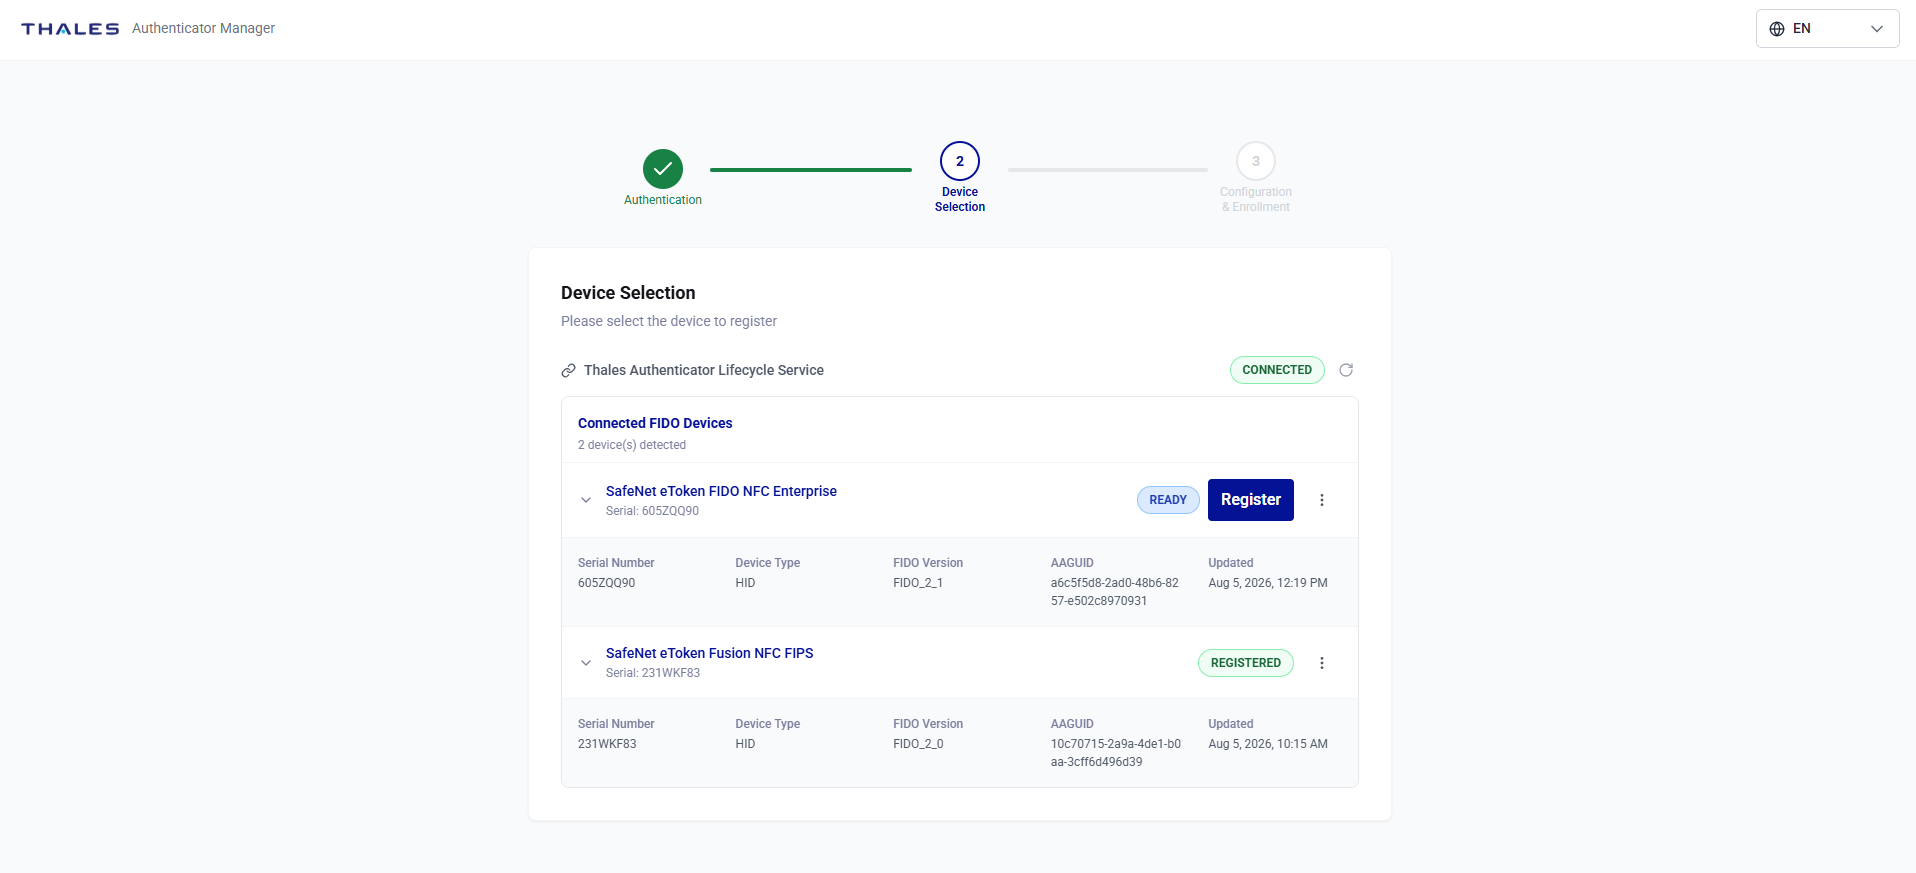
FIDO device registration
-
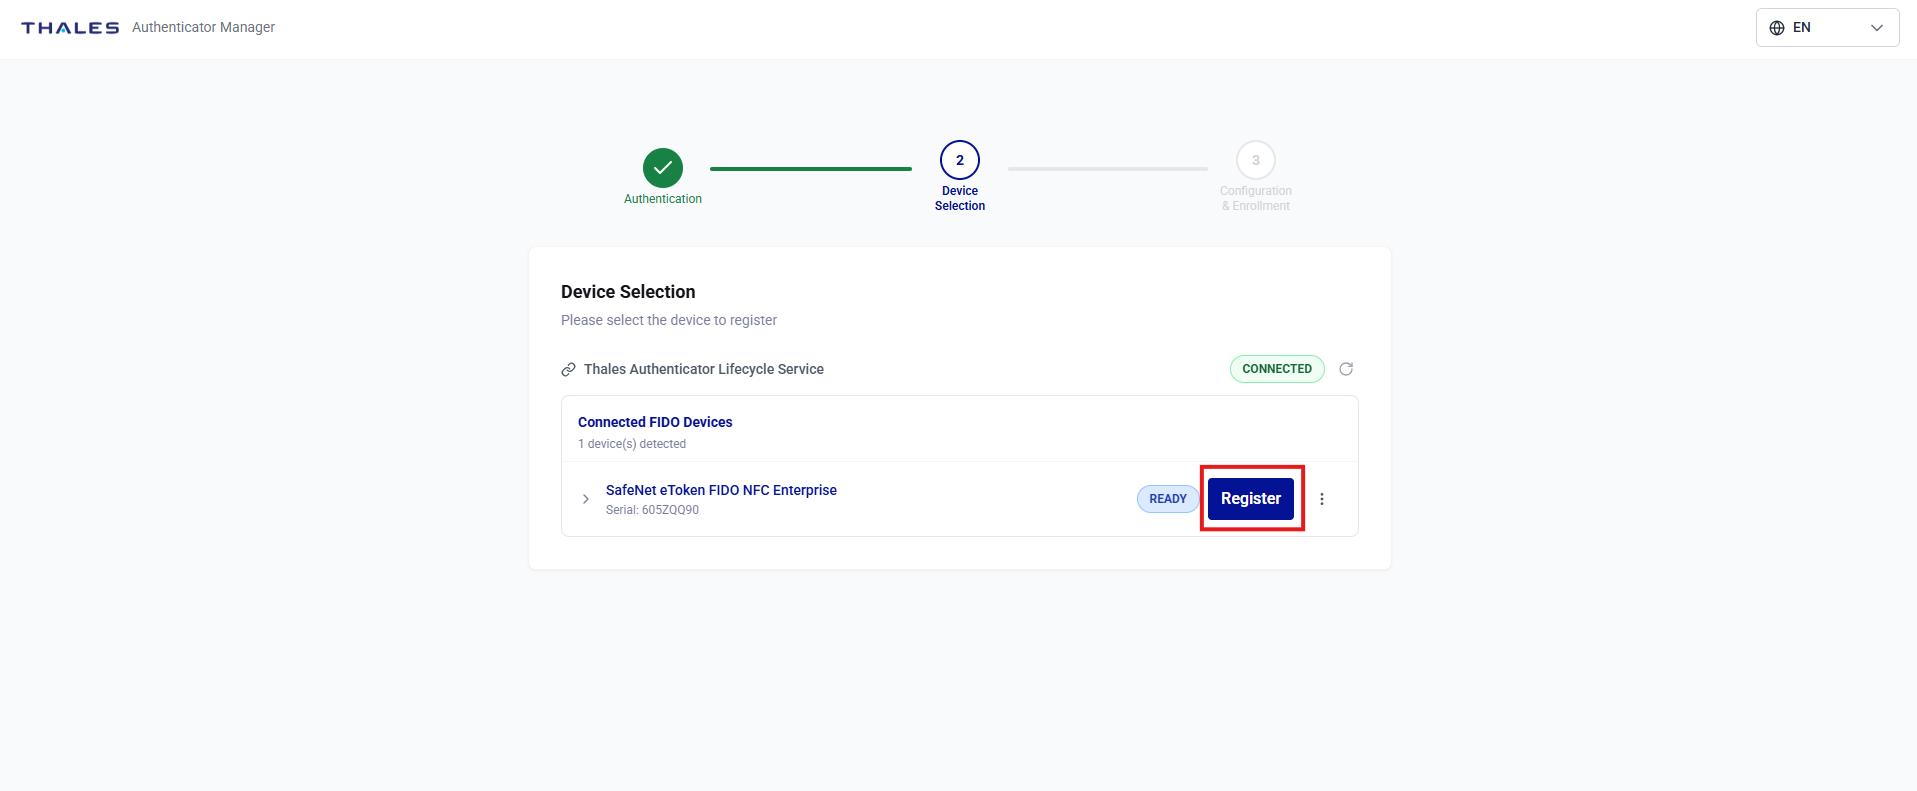
From the Connected FIDO Devices list, click on the Register button of the device you want to register.
-
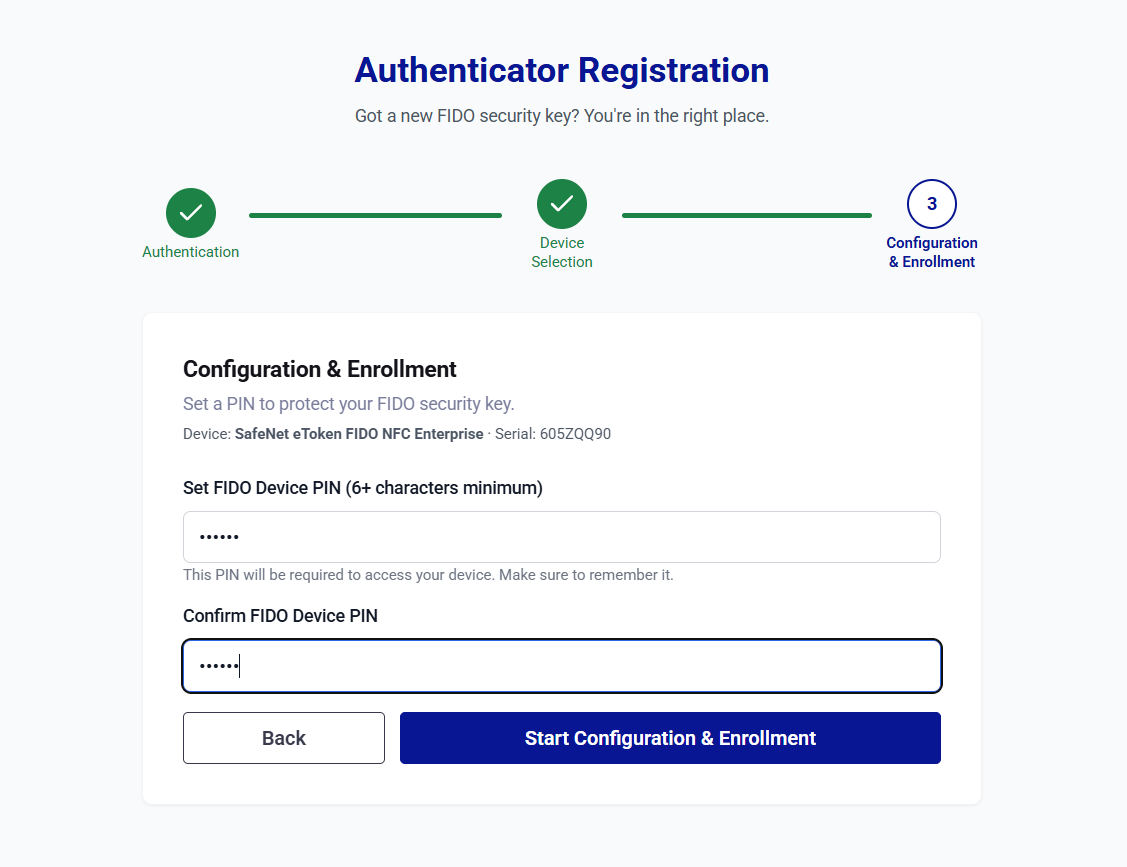
Enter a new PIN in the Set FIDO Device PIN field, and confirm it in the Confirm FIDO Device PIN field.
Caution
You will need this PIN every time you use your security device. Keep this PIN in a secure place. If you forget your PIN, you cannot recover it and will need to reset your device.
-
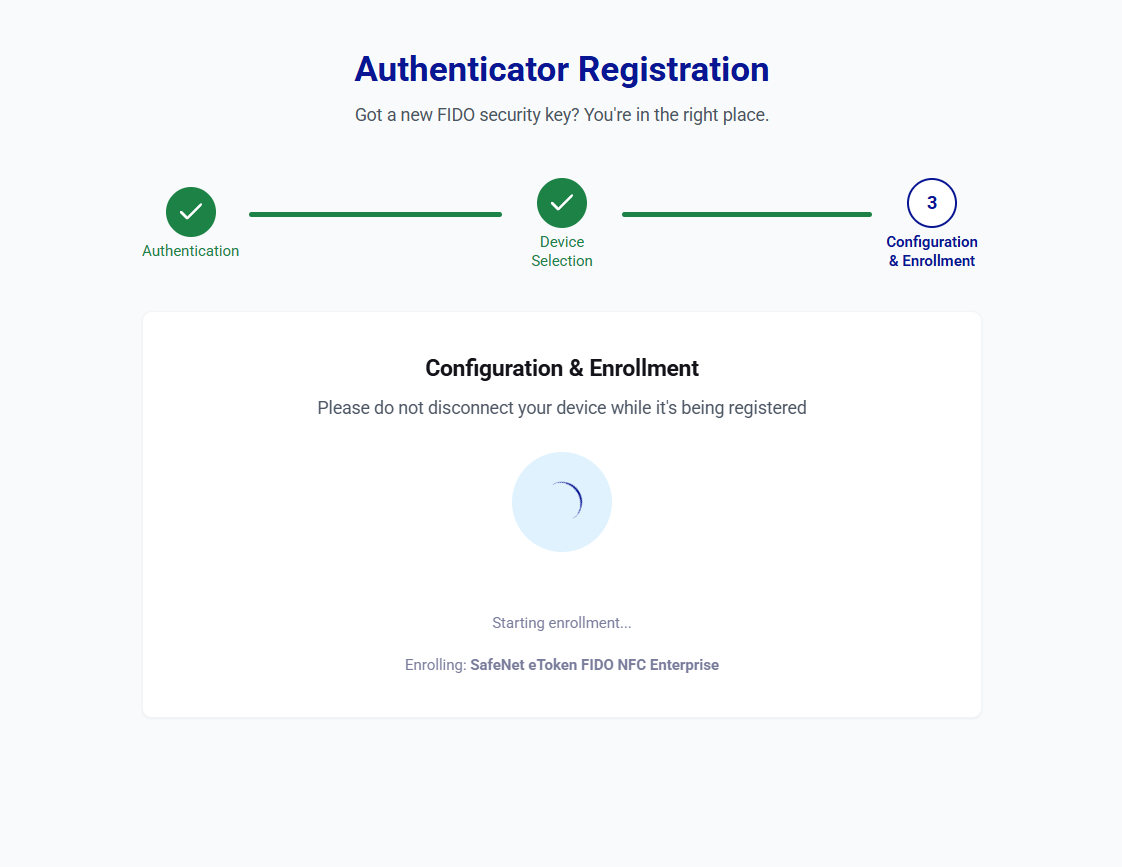
Click Start Configuration & Enrollment to begin setting up your device.
Caution
Do not unplug or disconnect your security device while registration is in progress.
Note
If the configuration succeeds but the registration fails, see Resolving a registration failure.
-
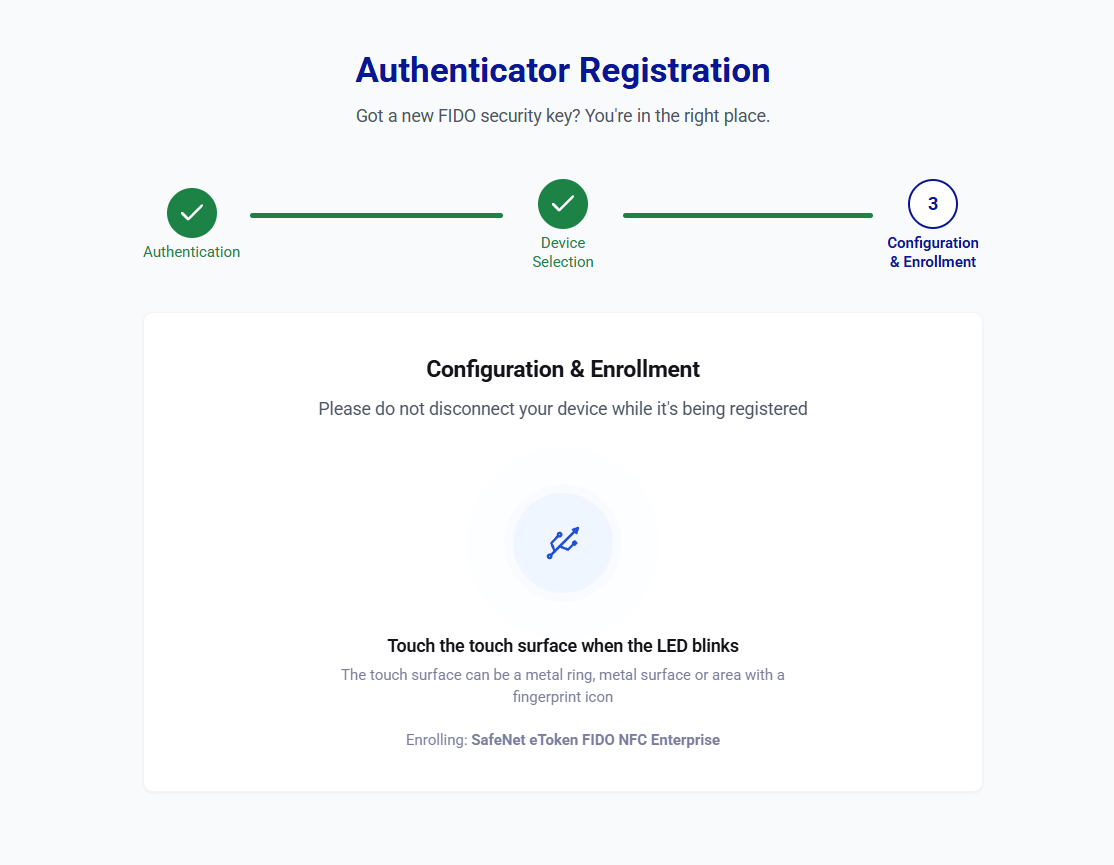
Touch the physical sensor on your security device when prompted. Most devices have a flashing or blinking light to show when they are ready for your touch. This step confirms that you are physically present at your computer.
-
Confirm that the Registration successful message displays. Your security device is now fully registered and ready to use for logon.
If you want to set up an additional key, click Register another device. Otherwise, you can close your web browser to finish.
Resolving a registration failure
If the portal configures your device but cannot complete the registration, the Enrollment Failed screen displays.
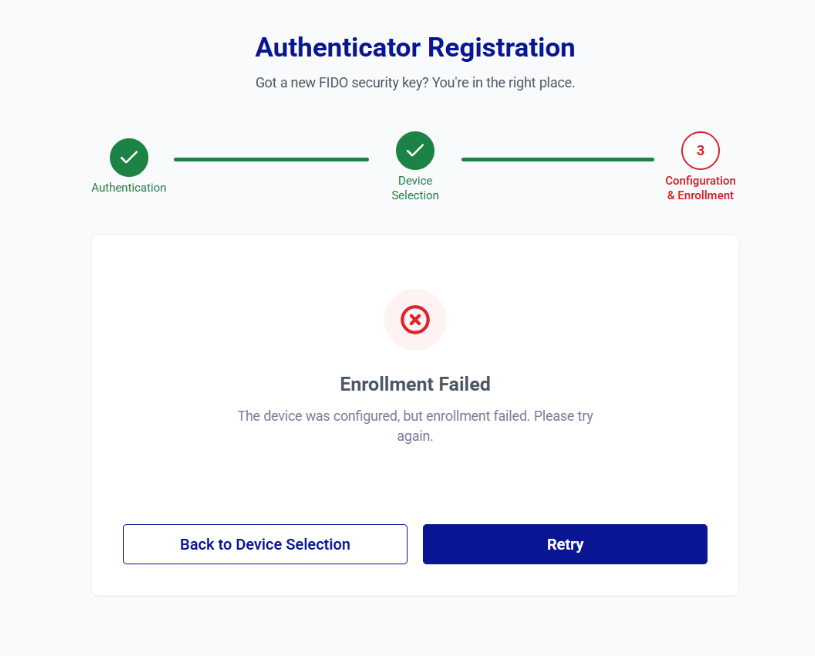
On the Enrollment Failed screen, you can select one of the following options:
- Retry – Select this option to attempt the registration process again. You can retry up to three times. If the registration still fails after the third attempt, contact your IT administrator.
-
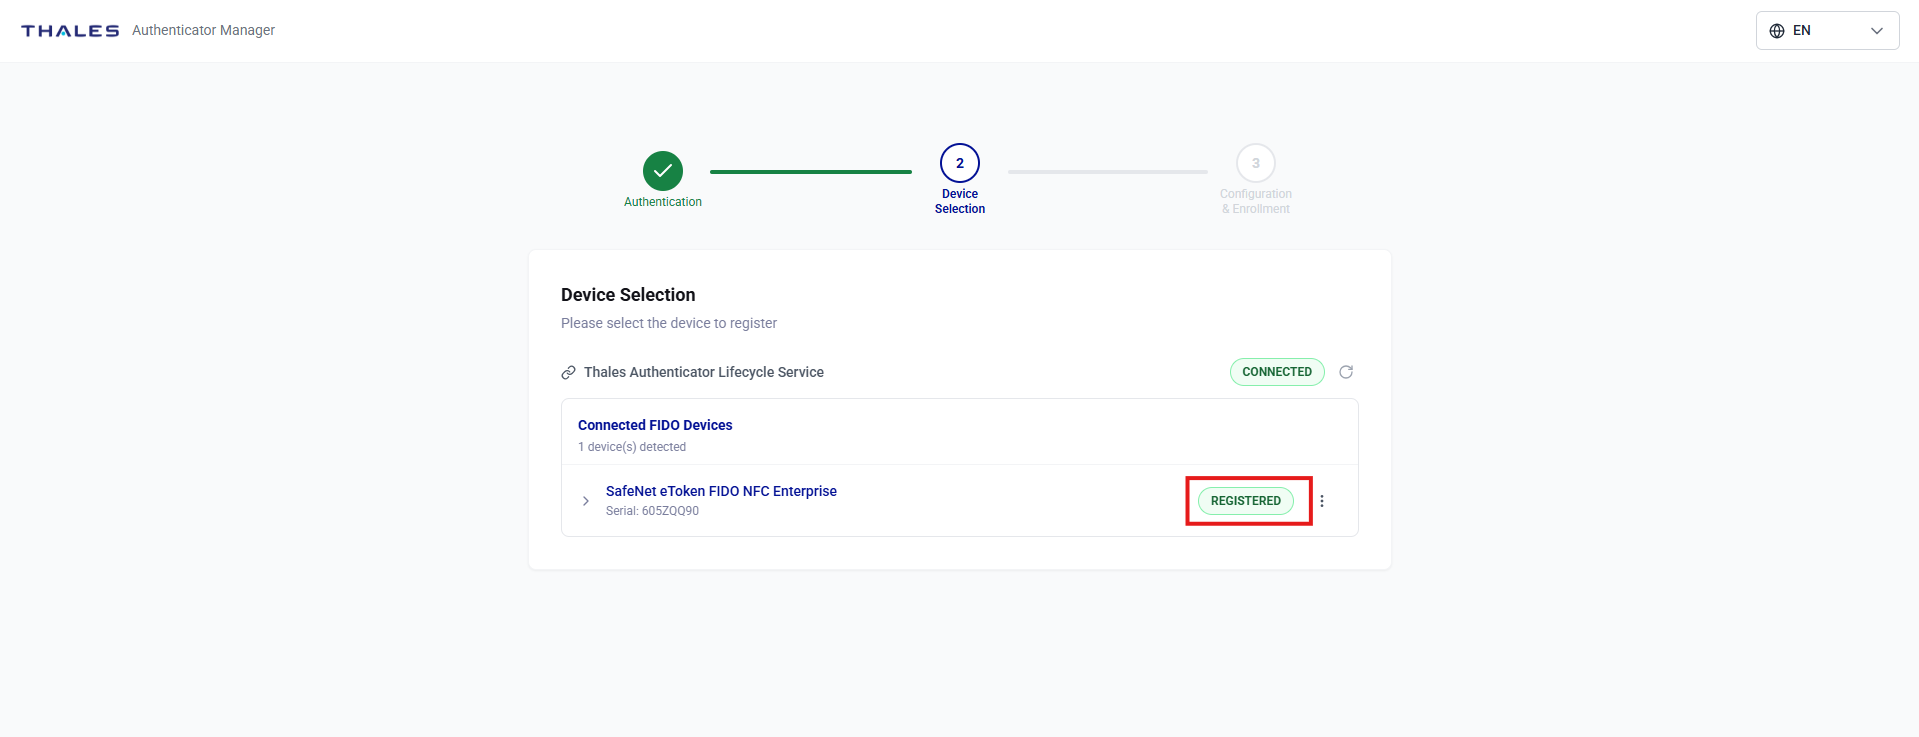
Back to Device Selection – Select this option to return to the device selection screen. Your device will now display with a REGISTERED status because a PIN was already set. You cannot attempt to register this device again. Contact your IT administrator for assistance.
Resetting your FIDO device
Note
This section is a placeholder. Detailed instructions for resetting security devices in the Authenticator Manager will be provided in a future release.
If you want to erase all data on your security device and restore it to its default factory settings, you can perform a device reset. Resetting a device permanently deletes all security credentials and PINs saved on the device.
Changing your FIDO device PIN
Note
This section is a placeholder. Detailed instructions for changing security device PINs in the Authenticator Manager will be provided in a future release.
You can update your security device PIN through the Authenticator Manager portal at any time if you want to choose a new PIN.
Unlocking your FIDO device
Note
This section is a placeholder. Detailed instructions for unlocking blocked security devices in the Authenticator Manager will be provided in a future release.
If you enter an incorrect PIN too many times, your security device will lock itself to protect your account. If your device is blocked, you can unlock it by using the Authenticator Manager portal.
Managing your fingerprints
Note
This section is a placeholder. Detailed instructions for managing fingerprints on biometric security devices in the Authenticator Manager will be provided in a future release.
If your security device supports biometrics (fingerprint recognition), you can register, verify, and delete your fingerprints by using the Authenticator Manager portal.

