



Theme and Brand Customization
Administrators can customize the appearance, logo, favicon, and text translations of the Authenticator Manager portal using Themes and Brands in the Thales console.
The custom branding options are managed through two main customization components:
- Theme – Defines the visual and text assets, including the full logo, the browser icon (favicon), and custom translation files for each supported language.
- Brand – Applies a specific theme and defines which language options (locales) are available.
To customize your portal, complete the following tasks:
- Configuring a theme – Define and publish the visual and language assets.
- Configuring a brand – Apply a theme and assign active locales.
Configuring a theme
Themes allow you to customize the full logo, browser favicon, and language files displayed in the Authenticator Manager portal.
Steps to Configure a theme
-
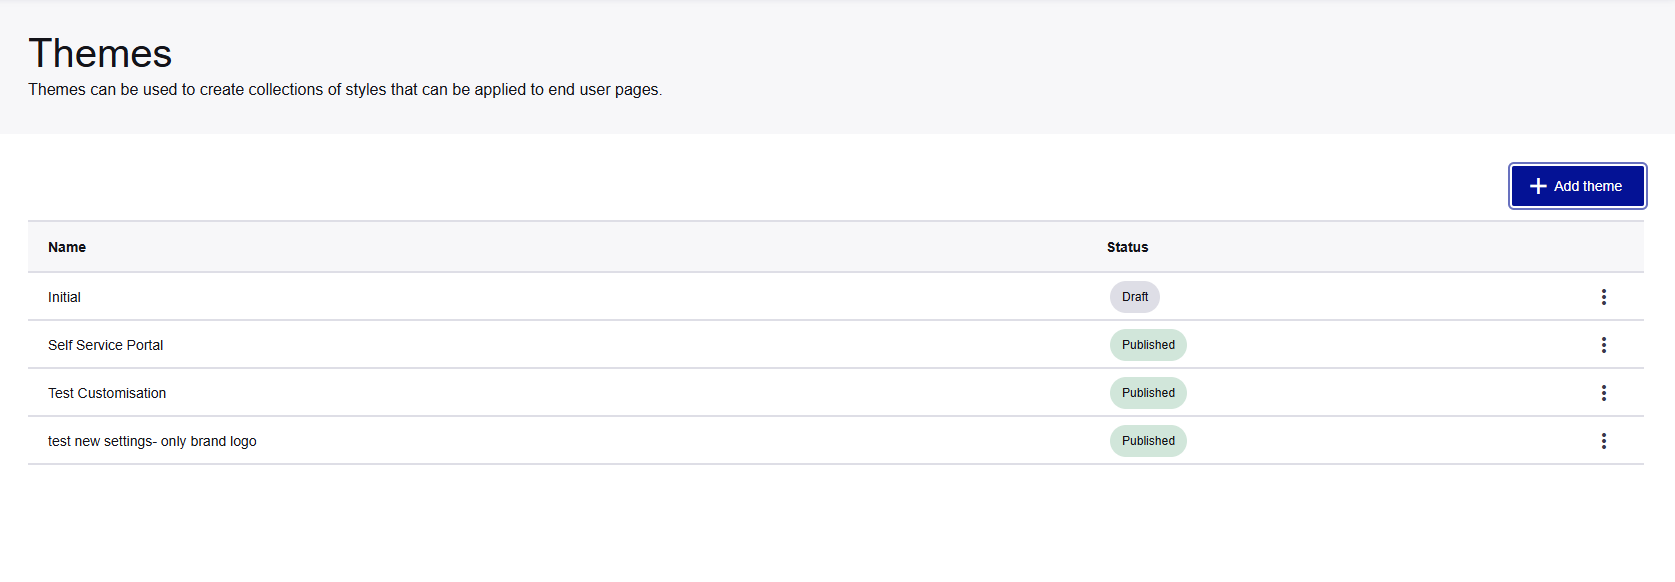
In the Thales console, navigate to Customizations > Themes. Click Add Theme.
-
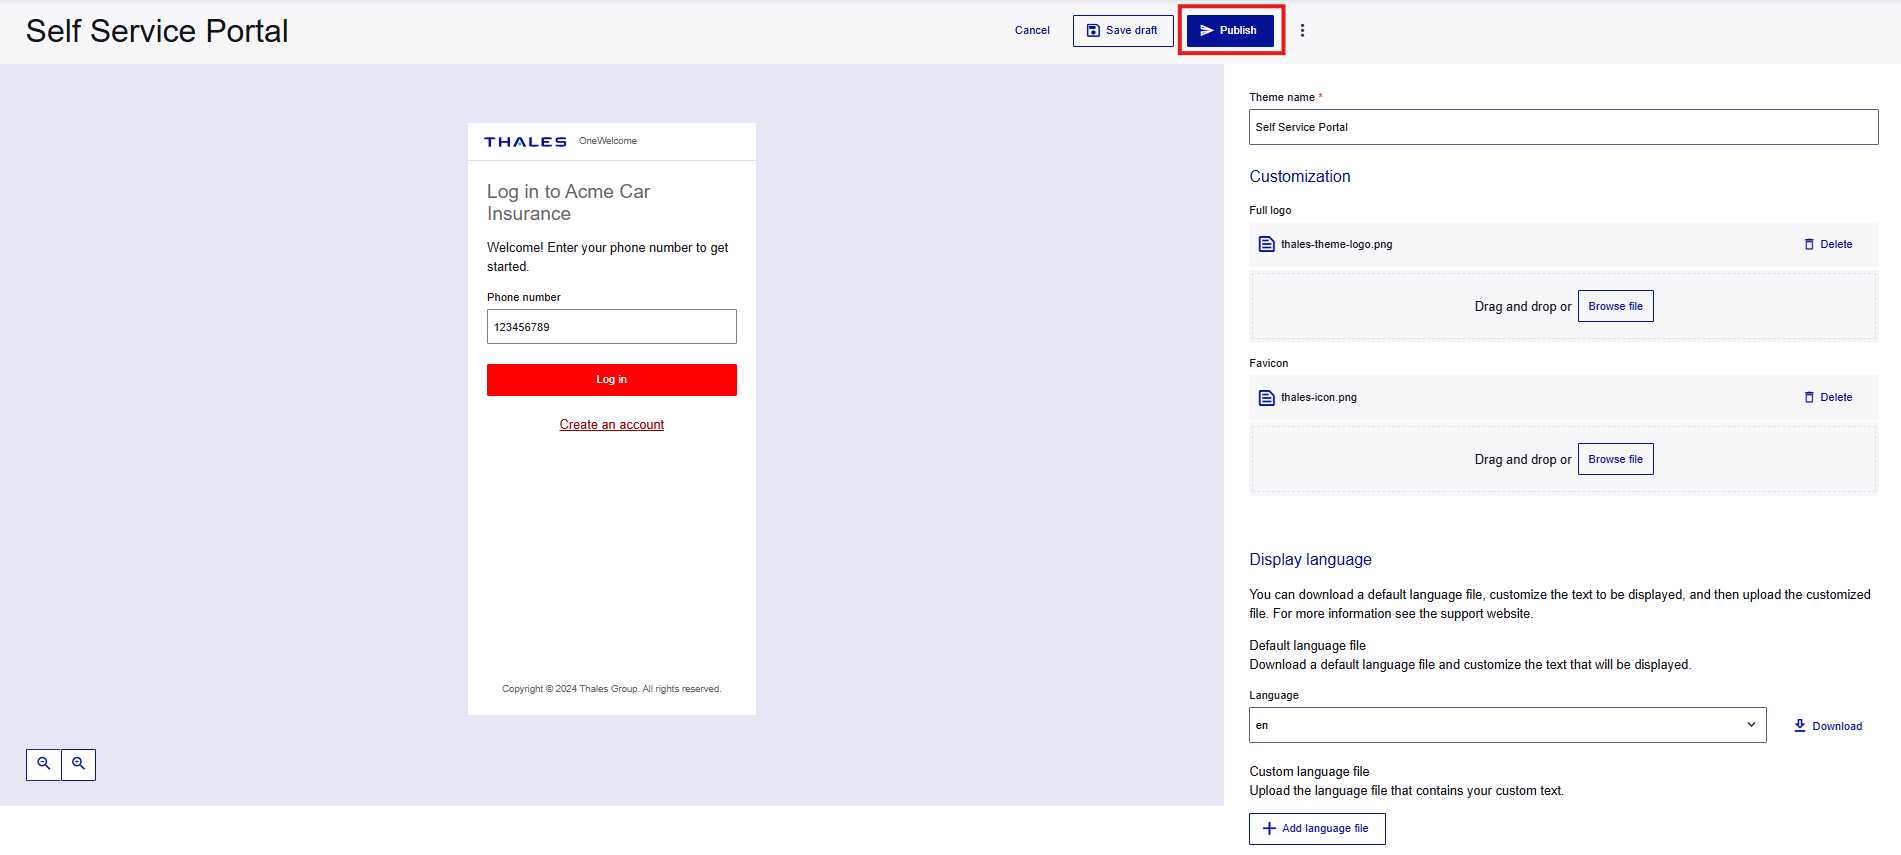
Enter a descriptive name for your theme in the Theme name field.
-
Upload your assets:
- In the Full logo section, drag and drop your logo image or click Browse file to upload it.
- In the Favicon section, drag and drop your browser icon or click Browse file to upload it.
-
Configure display language customizations:
- Select a locale from the Language dropdown menu.
- Click Download to obtain the default language JSON translation file.
- Edit the downloaded JSON file to customize portal terminology as needed.
- Click Add language file to upload your customized translation file.
-
Click Publish to make the theme active.
Note
Only published themes can be assigned to a brand and displayed to end users.
Configuring a brand
Brands allow you to assign a published theme and default locales to control the portal's appearance and language settings.
Steps to Configure a brand
-
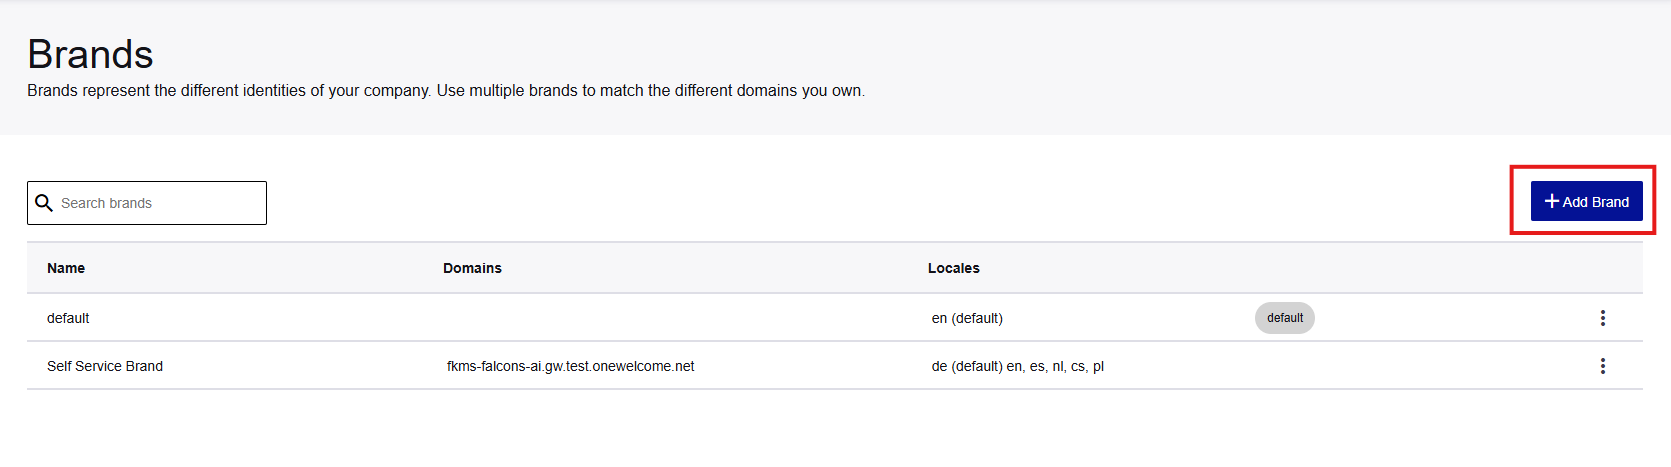
In the Thales console, navigate to Customizations > Brands. Click Add Brand.
-
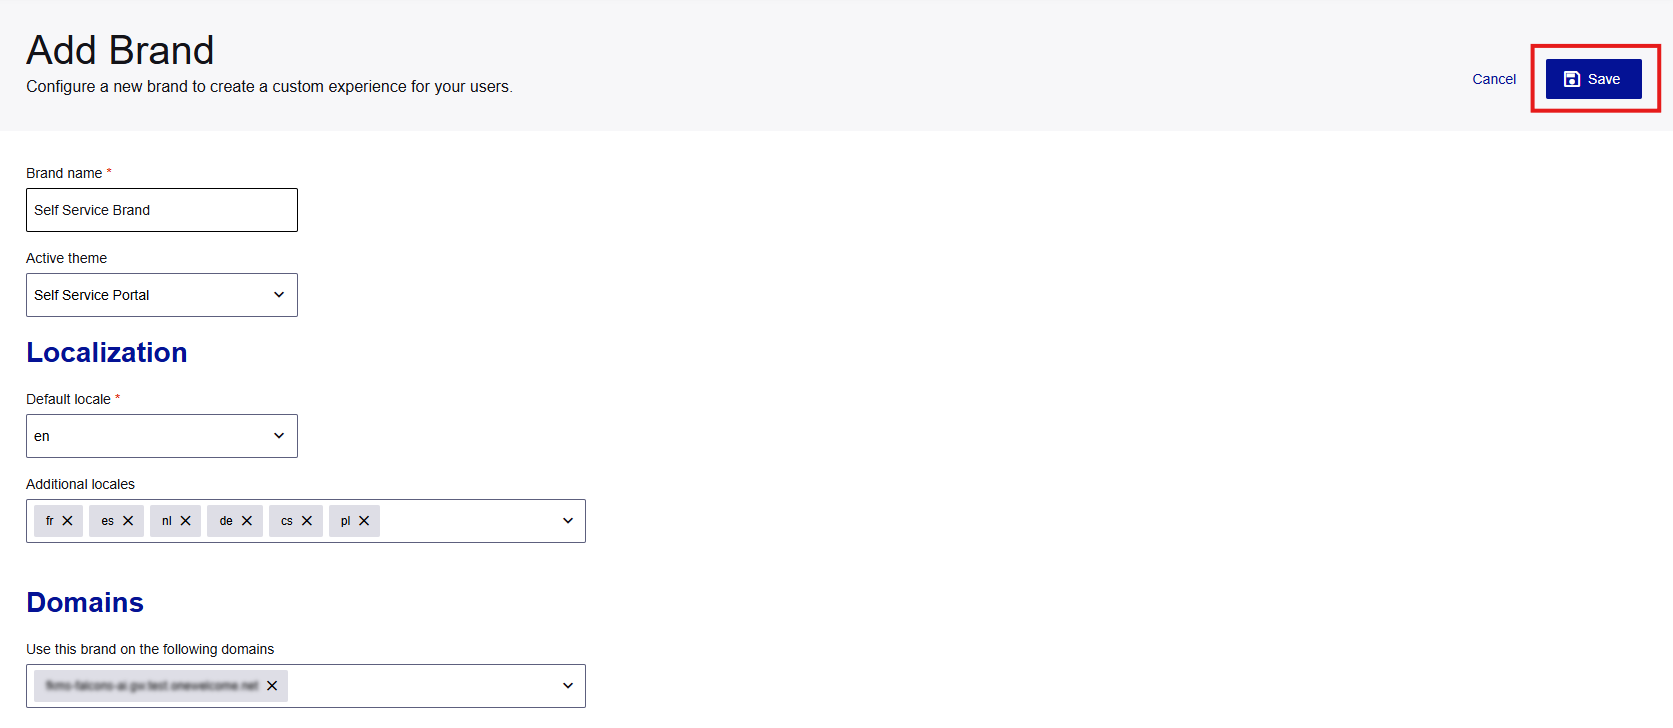
Configure the following fields in the brand form:
- Brand name – Enter a descriptive name for your brand.
- Active theme – Select a published theme from the dropdown menu to apply its visual assets.
- Localization – Choose a Default locale and select any Additional locales using the multi-select menu.
- Domains – Assign the specific tenant domain(s) that should use this brand configuration.
-
Click Save to apply the configuration.
Note
The console includes a built-in default brand that has no domain restrictions and is automatically used as a fallback if no other brand matches the domain.

